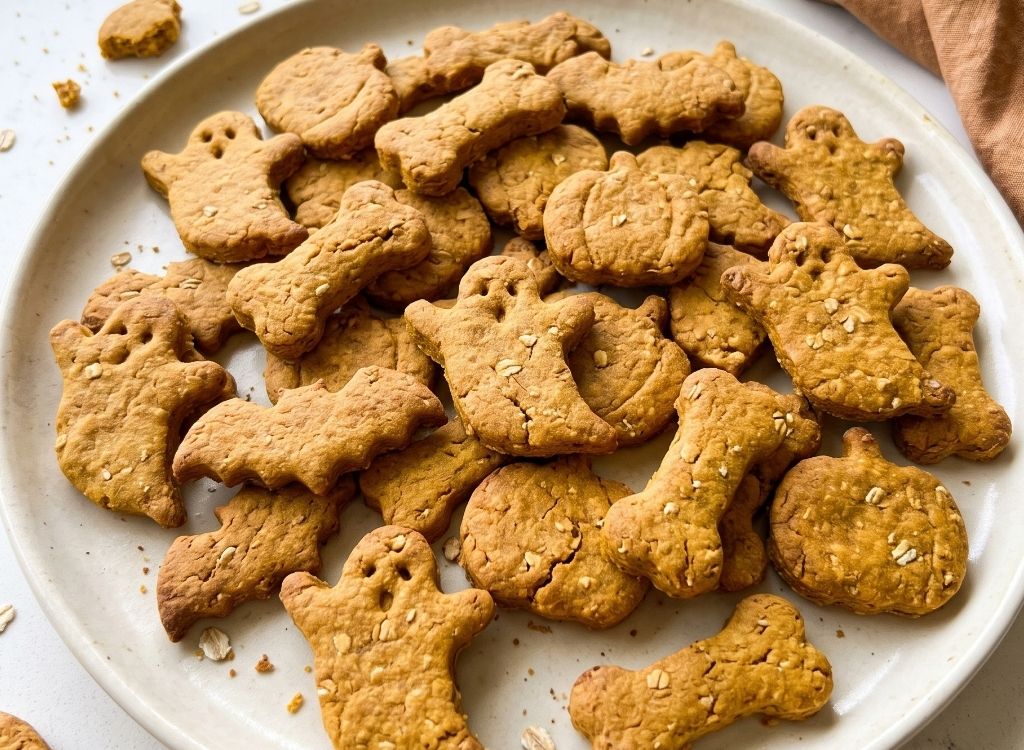
Your dog may not care about carved pumpkins, fake cobwebs, or the bowl of candy by the front door. Homemade snacks, though, usually get a much warmer reception.
These Halloween dog treat recipes give you an easy way to include your pup in the celebration without sharing human candy or loading homemade treats with sugary decorations. You will find crunchy biscuits, soft pumpkin bites, frozen yogurt treats, naturally colorful cookies, and a few shapes that look surprisingly festive with very little decorating skill required.
If you already make homemade dog cookie recipes, Halloween gives you a good excuse to pull out those pumpkin, ghost, bat, and bone cutters hiding in the back of the kitchen drawer. Many of the recipes below use familiar ingredients such as pumpkin, oats, peanut butter, banana, sweet potato, carrots, blueberries, spinach, and plain yogurt.
The nice part is that the Halloween theme mostly comes from the shape and color. You do not need candy eyes, frosting, chocolate drizzles, or anything else designed for human desserts.
Important: Always choose xylitol-free peanut butter, plain unsweetened yogurt, and 100% pumpkin purée rather than pumpkin pie filling. Introduce unfamiliar foods gradually, and speak with your veterinarian before offering homemade treats if your dog has allergies, digestive issues, pancreatitis, diabetes, or another condition that affects what they can eat.
1. Pumpkin Peanut Butter Halloween Dog Treats
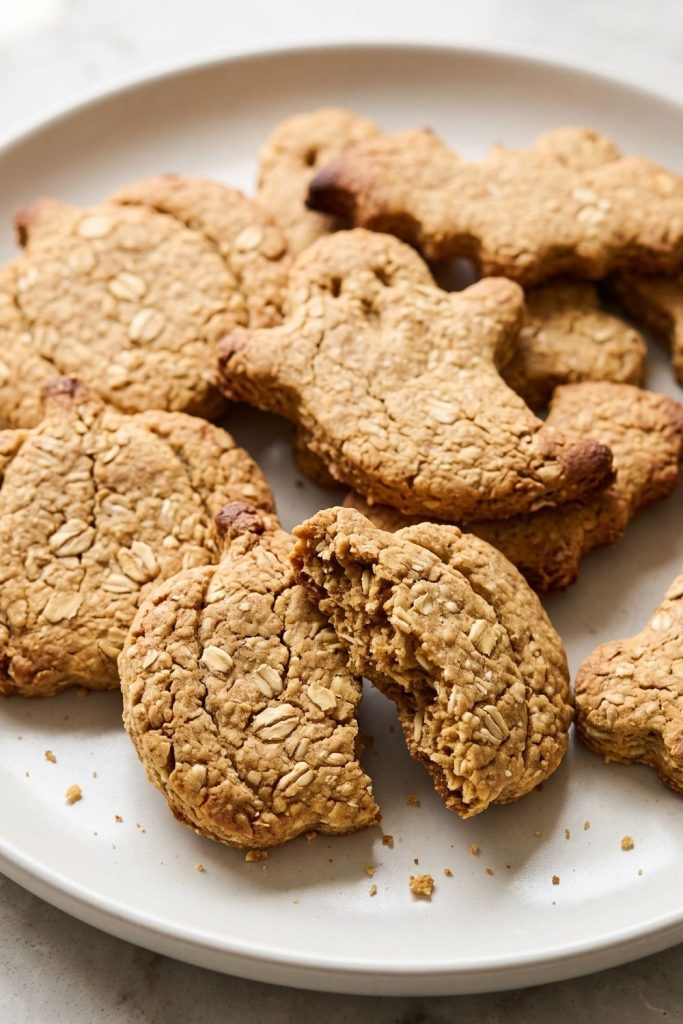
Among these Halloween dog treat recipes, this pumpkin and peanut butter version is one of the easiest options for classic cutout biscuits. Pumpkin and peanut butter show up in plenty of homemade dog cookie recipes, and there is a reason the pairing is so popular. The ingredients mix into a workable dough, the biscuits hold their shape well, and pumpkin gives them a naturally autumn-colored look.
You do not need much baking experience for these, either. Roll the dough, grab a pumpkin or bat cutter, and you have dog biscuits for Halloween that look far more elaborate than they really are.
This is also a simple option if you have been looking for pumpkin peanut butter dog cookies that do not require icing or decorative toppings.
Ingredients
- 1 cup 100% pumpkin purée
- ½ cup natural xylitol-free peanut butter
- 2 large eggs
- 2½ cups oat flour, plus more if needed
- ½ cup old-fashioned rolled oats
Instructions
- Preheat the oven to 350°F (175°C), then line a large baking sheet with parchment paper.
- Add the pumpkin purée, peanut butter, and eggs to a large bowl.
- Stir until the mixture looks smooth and evenly blended.
- Add the oat flour and rolled oats.
- Mix until a thick dough forms. If the dough clings to your hands or rolling pin, work in extra oat flour 1 tablespoon at a time.
- Transfer the dough to a lightly floured surface.
- Roll it to about 1/4-inch thick.
- Cut out pumpkins, ghosts, bats, bones, or any other shapes that fit your Halloween theme.
- Arrange the biscuits on the prepared baking sheet.
- Bake for 22 to 25 minutes, or until the bottoms are lightly golden and the biscuits feel firm.
- Let them cool completely before offering one to your dog.
Tips
- Want them a little crunchier? Switch off the oven after baking and leave the biscuits inside for another 10 to 15 minutes.
- Small cutters are especially useful if you have a smaller dog because the portions stay easier to manage.
- Keep the finished biscuits in an airtight container in the refrigerator for up to 7 days, or freeze them for up to 2 months.
2. Frozen Pumpkin Yogurt Ghost Dog Treats
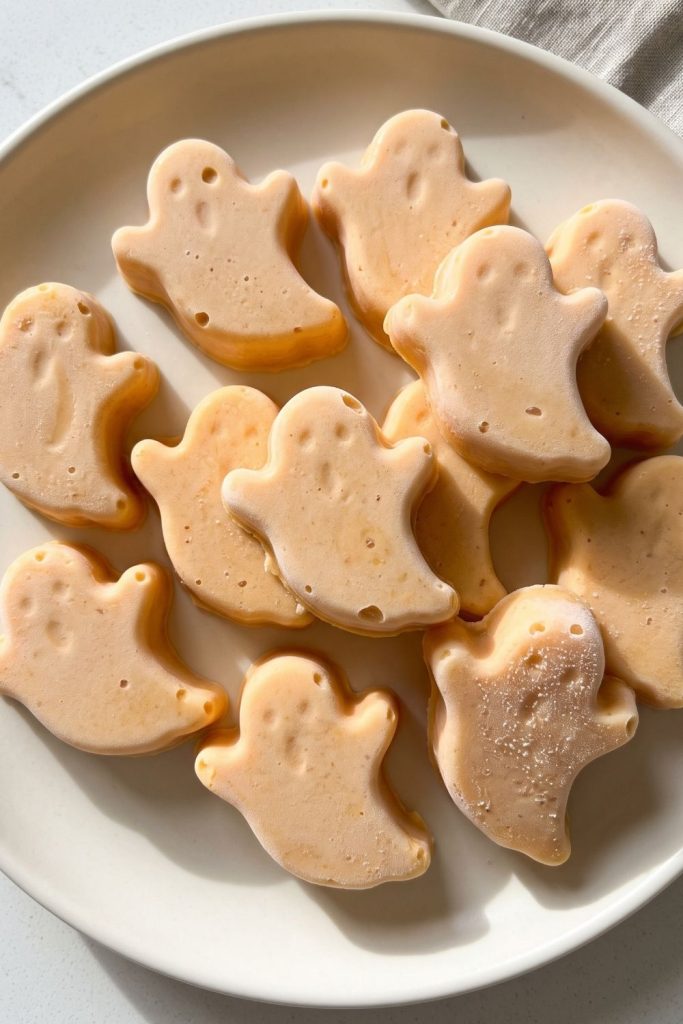
If turning on the oven feels like too much effort, these frozen pumpkin yogurt ghosts are probably the easiest place to start.
Everything gets mixed in one bowl and spooned into a silicone mold. After a few hours in the freezer, you have easy Halloween dog treats that look seasonal without any piping bags, cookie cutters, or decorating.
Ghost molds are cute, but pumpkins, skulls, paws, or small bones work just as well.
Ingredients
- 1 cup plain unsweetened Greek yogurt
- 1/2 cup 100% pumpkin purée
- 1 small ripe banana
Instructions
- Peel the banana and place it in a medium bowl.
- Mash it well with a fork until only a few small lumps remain.
- Add the pumpkin purée and Greek yogurt.
- Stir until everything is evenly mixed.
- Spoon the mixture into ghost-shaped or other Halloween silicone molds.
- Tap the mold lightly on the counter to help release larger air pockets.
- Freeze for at least 3 to 4 hours, or until the treats are solid all the way through.
- Pop the treats out of the molds.
- Transfer them to a freezer-safe container and keep them frozen until serving.
Tips
- Mini molds make portioning much easier for small dogs.
- Because yogurt melts quickly, these treats belong in the freezer rather than on the counter or in a treat jar.
- Some dogs do not tolerate dairy particularly well. If yours is one of them, choose one of the baked recipes instead.
3. Sweet Potato Jack-O'-Lantern Dog Treats
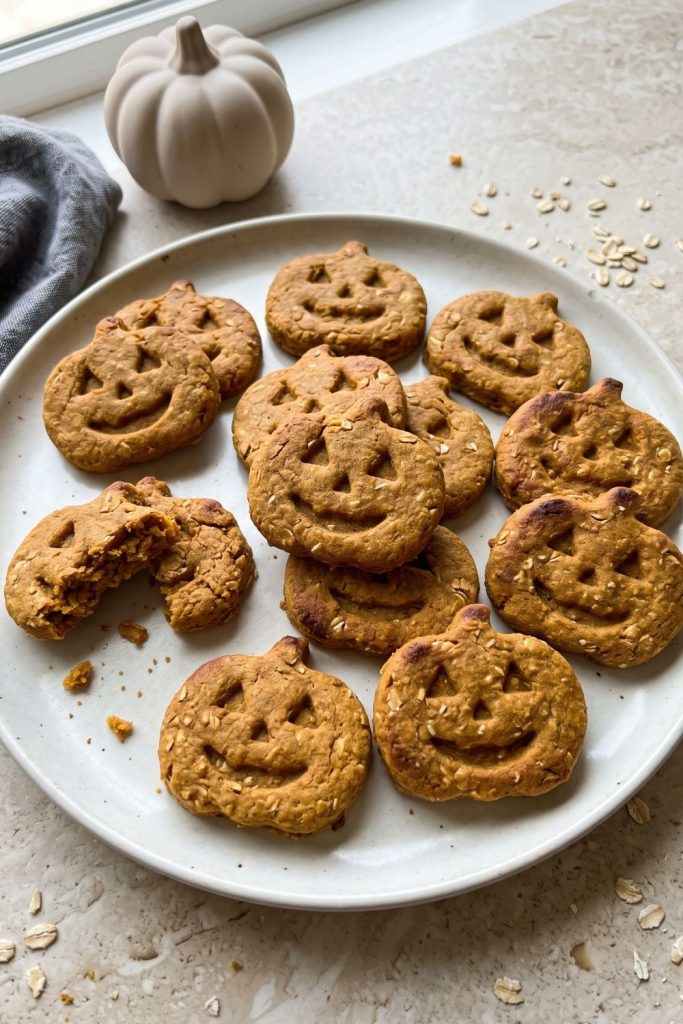
Sweet potato already has the right Halloween color, which saves you from trying to make dog treats orange with artificial coloring.
These biscuits stay a little softer in the middle than a dry commercial biscuit. Before baking, you can score a face and a few curved pumpkin lines into each one with the tip of a small knife.
That tiny step changes the whole look. An ordinary pumpkin cookie suddenly becomes a miniature jack-o’-lantern.
Ingredients
- 1 cup cooked and mashed sweet potato, cooled
- 1 large egg
- 2 cups oat flour
- 1/2 cup old-fashioned rolled oats
- 1 tablespoon natural xylitol-free peanut butter, optional
Instructions
- Preheat the oven to 350°F (175°C).
- Line a baking sheet with parchment paper.
- Spoon the cooled mashed sweet potato into a large mixing bowl.
- Add the egg and peanut butter, if you are using it.
- Stir in the oat flour and rolled oats.
- Mix until the dough feels soft but sturdy enough to roll.
- Roll it to about 1/3-inch thick.
- Cut out pumpkin shapes with a cookie cutter.
- Use a small knife to lightly score eyes, a mouth, and curved pumpkin lines into each piece. Try not to cut all the way through the dough.
- Transfer the treats to the prepared baking sheet.
- Bake for 20 to 25 minutes, or until they feel firm to the touch.
- Cool completely before serving.
Tips
- Sweet potatoes can vary quite a bit in moisture. If your dough feels sticky, add a little more oat flour until it becomes manageable.
- For a softer biscuit, keep the dough slightly thicker and pull the treats from the oven as soon as they are set.
- Store them in the refrigerator and use them within about 5 to 7 days.
4. Apple Cinnamon Halloween Dog Biscuits
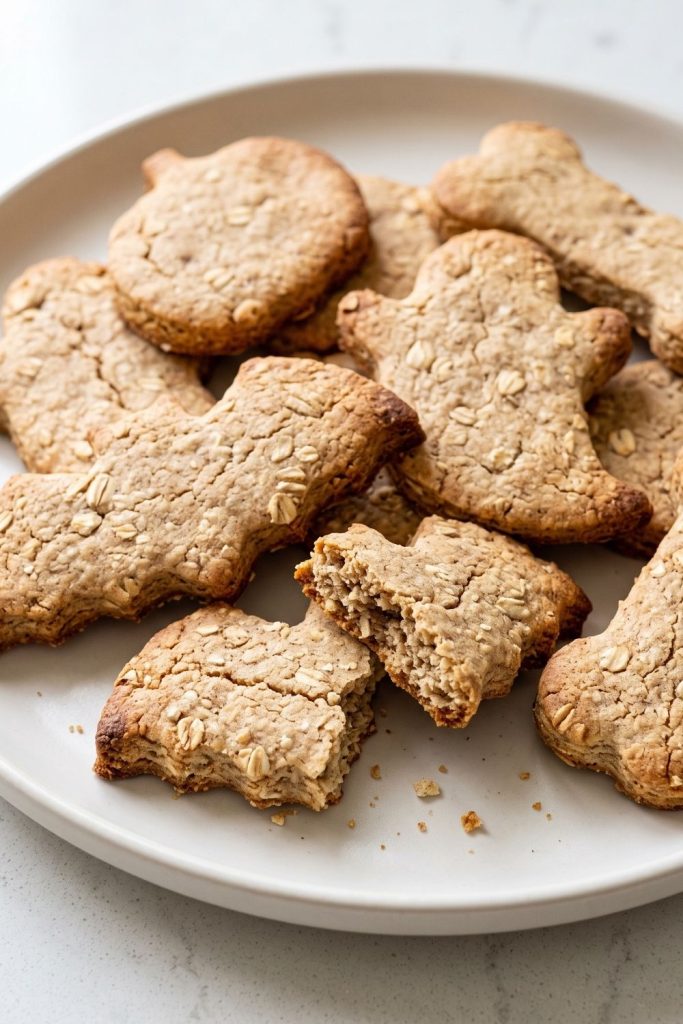
Apple and cinnamon smell like autumn before the baking sheet even leaves the oven.
Unsweetened applesauce gives these biscuits moisture and a little natural sweetness, while a small amount of cinnamon adds that familiar fall aroma. The dough is firm enough for cookie cutters, so this is a good recipe for bats, witch hats, ghosts, or pumpkins.
A word about spices matters here. Cinnamon in the small amount used below is very different from adding a spoonful of pumpkin pie spice to the bowl. Skip blends that contain nutmeg.
Ingredients
- 3/4 cup unsweetened applesauce
- 1 large egg
- 2 tablespoons natural xylitol-free peanut butter
- 2 1/2 cups oat flour
- 1/2 cup old-fashioned rolled oats
- 1/4 teaspoon ground cinnamon
Instructions
- Preheat the oven to 350°F (175°C).
- Line a large baking sheet with parchment paper.
- Combine the applesauce, egg, and peanut butter in a mixing bowl.
- Stir until the wet ingredients are smooth.
- Add the oat flour, rolled oats, and cinnamon.
- Mix until you have a firm dough.
- Roll the dough to about 1/4-inch thick.
- Cut it into your favorite Halloween shapes.
- Arrange the biscuits on the lined baking sheet.
- Bake for 22 to 25 minutes, or until they feel firm and dry on the surface.
- Let them cool fully before giving them to your dog.
Tips
- Check the applesauce label before using it. You want plain, unsweetened applesauce without artificial sweeteners.
- If your dog likes a crunchier biscuit, switch the oven off after baking and let the treats sit inside for another 10 to 15 minutes.
- Keep the cinnamon measurement small, and do not add nutmeg.
5. Pumpkin Banana Soft Dog Treat Bites
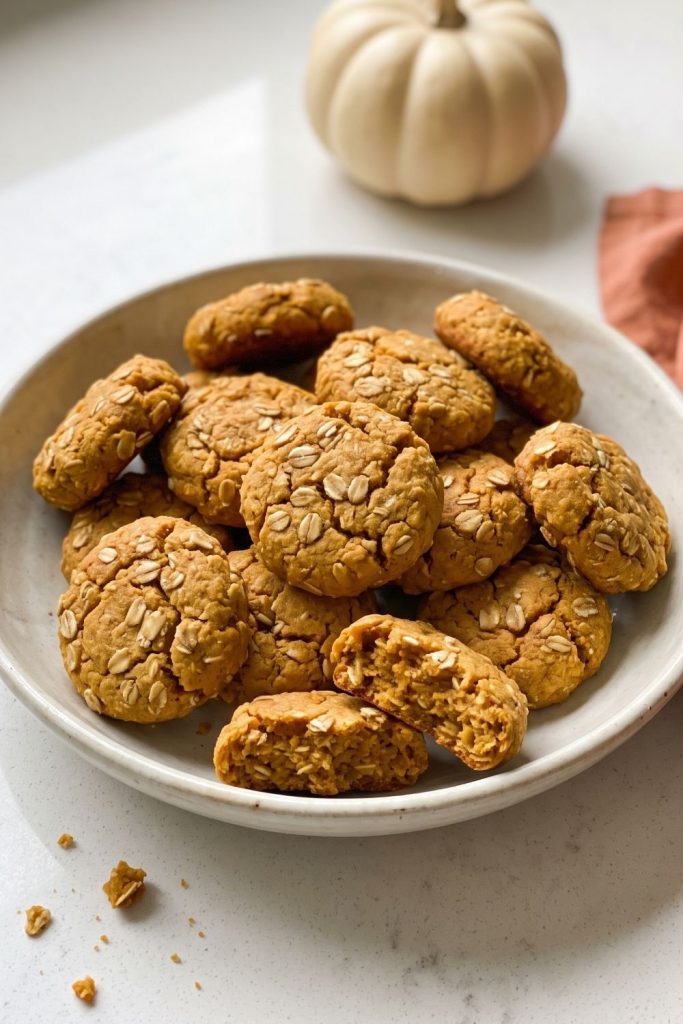
If you are comparing Halloween dog treat recipes for dogs that prefer softer snacks, these pumpkin banana bites are a useful alternative to crunchy biscuits.
Not every homemade dog treat needs to snap like a biscuit. These bites stay softer, which can make them easier to portion into small pieces. They also skip the rolling pin completely, so they are handy when you want to make something quickly without turning the kitchen into a flour-covered baking project.
If you often search for healthy dog treat recipes, this is the sort of simple ingredient list you are probably looking for. Just remember that wholesome ingredients do not make treats unlimited.
Ingredients
- 1 ripe banana
- 3/4 cup 100% pumpkin purée
- 1 large egg
- 1 1/2 cups oat flour
- 1 cup old-fashioned rolled oats
Instructions
- Preheat the oven to 350°F (175°C).
- Line a baking sheet with parchment paper.
- Mash the banana in a large bowl until mostly smooth.
- Add the pumpkin purée and egg.
- Stir until the mixture is evenly combined.
- Add the oat flour and rolled oats.
- Mix until the dough becomes thick enough to scoop.
- Drop small portions onto the prepared baking sheet.
- Flatten each mound slightly with the back of a spoon.
- Bake for 18 to 20 minutes, or until the bites are set.
- Let them cool completely before serving.
Tips
- You can press the mixture into small pumpkin-shaped silicone molds if you want them to look a little more festive.
- These bites hold more moisture than a crunchy biscuit, so refrigeration is important. Use them within about 5 days.
- If you make a full batch for a small dog, freezing the extras is usually the more practical option.
6. Frozen Blueberry Monster Eye Dog Treats
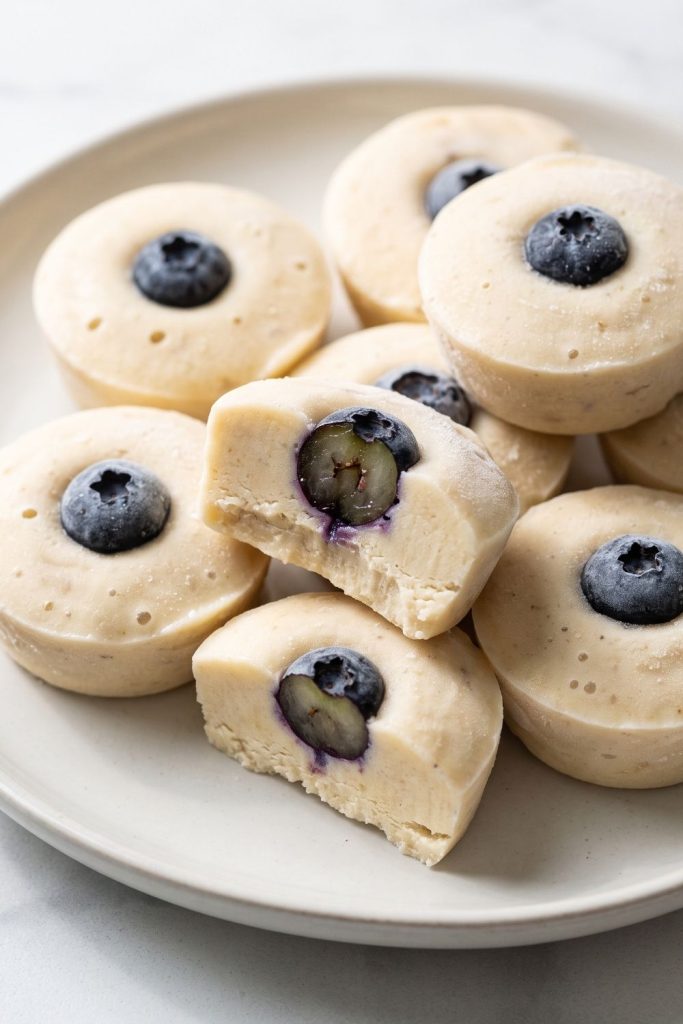
This is one of those Halloween ideas that looks much more complicated than it is.
Place a blueberry in the center of a round silicone mold, surround it with a banana and yogurt mixture, then freeze the whole thing. Once the treats come out of the mold, the blueberry looks a bit like the pupil of a monster eye.
The result is slightly weird, appropriately spooky, and very easy to make.
Ingredients
- 1 cup plain unsweetened Greek yogurt
- 1 ripe banana
- 1/2 cup fresh or frozen blueberries
Instructions
- Peel the banana and mash it until smooth.
- Stir in the Greek yogurt until the mixture looks creamy.
- Place one blueberry in the center of each cavity in a round silicone mold.
- Spoon the yogurt mixture around and over the blueberries.
- Fill each cavity almost to the top.
- Tap the mold gently against the counter so the mixture settles around the fruit.
- Freeze for 3 to 4 hours, or until completely solid.
- Remove the frozen treats from the mold.
- Store them in a freezer-safe container until you are ready to serve one.
Tips
- For a small dog, use tiny molds or divide a larger frozen treat into a more appropriate portion before serving.
- Choose plain yogurt without added sugar or artificial sweeteners.
- These soften quickly once they leave the freezer, so serving them on an easy-to-clean floor or outdoors may save you a sticky cleanup.
7. Carrot Pumpkin Halloween Dog Cookies
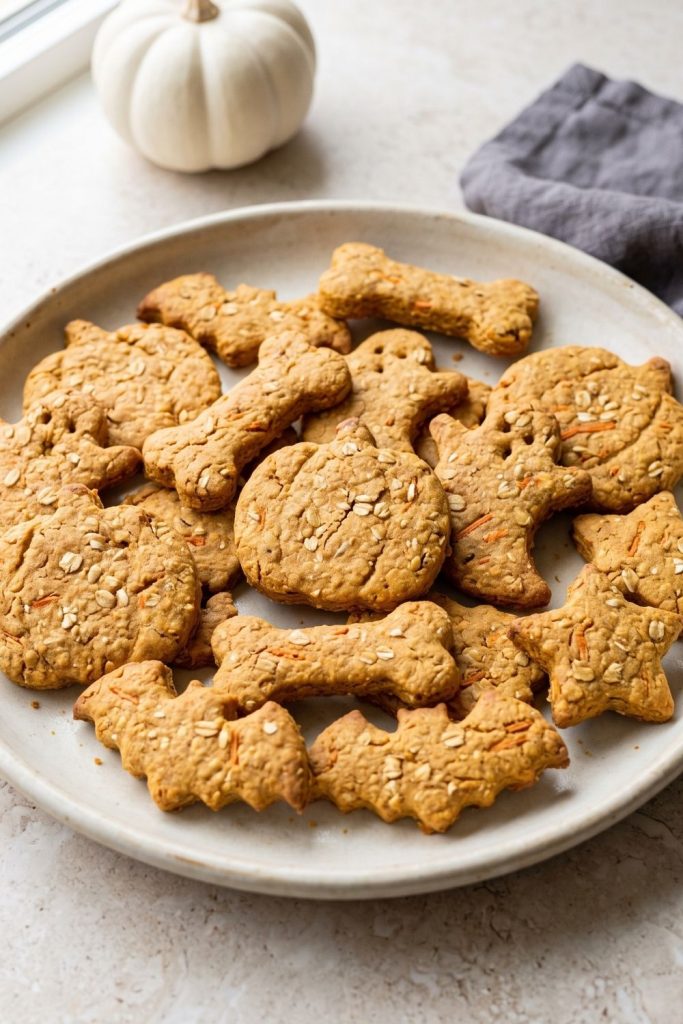
This is one of the Halloween dog treat recipes that gets its seasonal orange color entirely from familiar ingredients.
Pumpkin gets most of the attention in fall dog treats, but grated carrot fits right in. Together, pumpkin and carrot give these cookies a warm orange color without food dye. The dough also rolls nicely, which makes this one of the easier homemade dog cookie recipes to use with detailed cutters.
Want the pumpkins to look a little more realistic? Score a few curved lines into the dough before baking.
Ingredients
- 3/4 cup 100% pumpkin purée
- 1/2 cup finely grated carrot
- 1 large egg
- 2 tablespoons natural xylitol-free peanut butter
- 2 cups oat flour
- 1/2 cup old-fashioned rolled oats
Instructions
- Preheat the oven to 350°F (175°C).
- Line a large baking sheet with parchment paper.
- Add the pumpkin purée, finely grated carrot, egg, and peanut butter to a mixing bowl.
- Stir until the wet ingredients are well combined.
- Add the oat flour and rolled oats.
- Mix until a thick dough develops.
- If the dough feels too sticky for rolling, work in a little extra oat flour.
- Roll the dough to about 1/4-inch thick.
- Cut out pumpkins, ghosts, bones, bats, or other Halloween shapes.
- Transfer the cookies to the prepared baking sheet.
- Bake for 22 to 25 minutes, or until firm.
- Cool completely before serving.
Tips
- Finely grated carrot works better than thick shreds because it is less likely to drag through the dough when you use a cookie cutter.
- For pumpkin-shaped cookies, lightly score curved lines into the surface before baking.
- Refrigerate the finished treats and use them within about one week.
8. Peanut Butter Spider Dog Treats
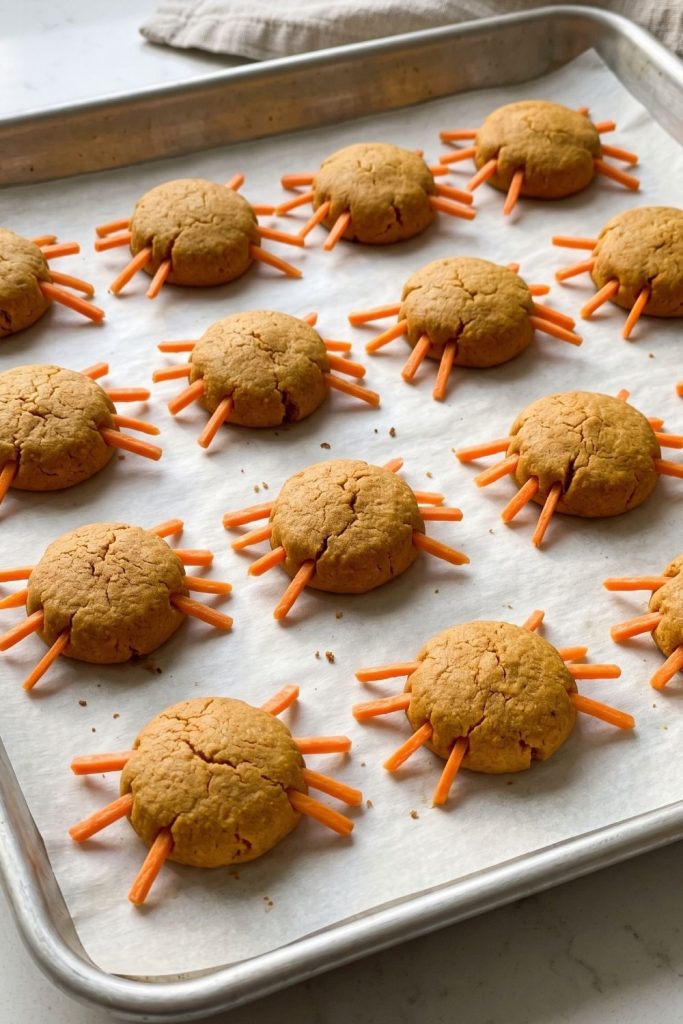
Spider cookies sound like the sort of thing that should involve elaborate decorating, but these do not.
The spider body is simply a small ball of biscuit dough, and the legs are thin strips pressed into the sides before baking. No candy eyes, icing, melted chocolate, or fiddly decorations are required.
Admittedly, shaping eight tiny legs on every biscuit takes more patience than using a regular cookie cutter. If you get halfway through the tray and regret your life choices, a spider-shaped cutter works perfectly well.
Ingredients
- 1/2 cup natural xylitol-free peanut butter
- 1/2 cup 100% pumpkin purée
- 1 large egg
- 2 to 2 1/4 cups oat flour
Instructions
- Preheat the oven to 350°F (175°C).
- Line a large baking sheet with parchment paper.
- Stir the peanut butter, pumpkin purée, and egg together in a mixing bowl.
- Gradually mix in 2 cups of oat flour.
- Continue stirring until the dough becomes firm, adding a little more flour if needed.
- Roll small portions into balls to make the spider bodies.
- Place the balls on the prepared sheet and flatten them slightly.
- Pinch off tiny pieces of dough and roll them into thin strips.
- Attach four short legs to each side of the spider body.
- Press the connection points gently so the legs are less likely to separate in the oven.
- Bake for about 18 to 22 minutes, depending on the size of your spiders.
- Let them cool completely before serving.
Tips
- Keep the spiders fairly small. Long, skinny biscuit legs are much more likely to snap.
- If shaping them individually becomes too time-consuming, roll the dough flat and use a spider cookie cutter instead.
- The shape already gives you the Halloween effect, so skip candy decorations and chocolate entirely.
9. Green Spinach Monster Dog Treats
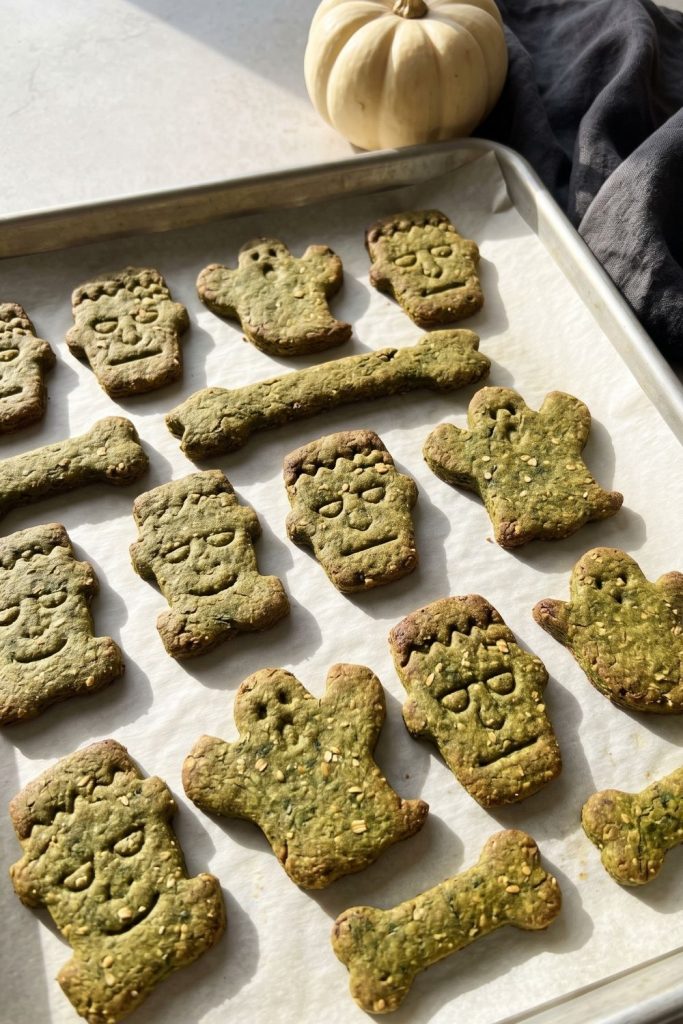
Bright neon green dog cookies would probably require artificial coloring. These go in a different direction.
Spinach gives the dough a naturally green tint, while banana helps with moisture and texture. After baking, the color usually darkens into more of an olive green than a cartoon-monster shade, but that actually suits the Halloween look rather well.
Use Frankenstein, monster, bat, ghost, or bone cutters, depending on what you have.
Ingredients
- 1 packed cup fresh baby spinach
- 1 ripe banana
- 1 large egg
- 1 tablespoon natural xylitol-free peanut butter
- 2 cups oat flour
- 1/2 cup old-fashioned rolled oats
Instructions
- Preheat the oven to 350°F (175°C).
- Line a baking sheet with parchment paper.
- Add the spinach, banana, egg, and peanut butter to a food processor or blender.
- Blend until the mixture is fairly smooth.
- Pour it into a large mixing bowl.
- Stir in the oat flour and rolled oats.
- Add a little extra oat flour if the dough feels too soft or sticky to roll.
- Roll the dough to about 1/4-inch thick.
- Cut it into monster faces, bones, ghosts, bats, or other Halloween shapes.
- Arrange the treats on the prepared baking sheet.
- Bake for 20 to 22 minutes, or until firm.
- Let them cool fully before serving.
Tips
- Do not be surprised if the color changes in the oven. Natural spinach green tends to become darker and more muted during baking.
- Because these cookies retain some moisture, store them in the refrigerator and use them within about 5 days.
- Freeze whatever you will not use in that time.
10. Pumpkin Coconut Halloween Dog Treats
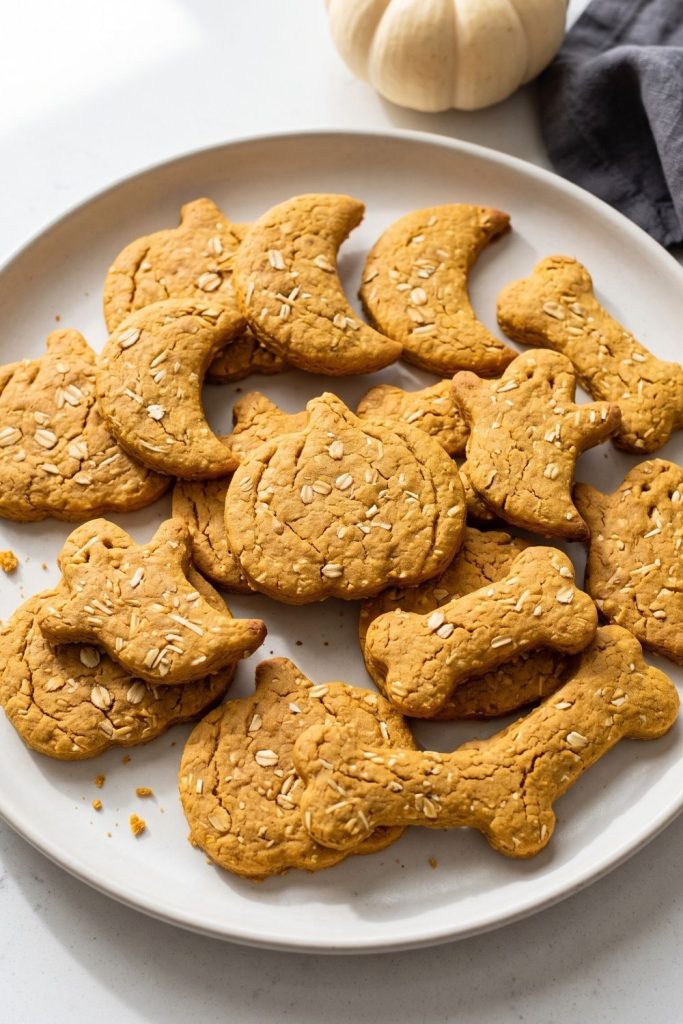
If nearly every dog biscuit recipe you find seems to include peanut butter, this pumpkin coconut version changes things up a little.
Pumpkin keeps the dough moist, while finely shredded unsweetened coconut adds texture. A small amount of coconut oil helps bring everything together.
Moons look especially good with this dough, but pumpkins, ghosts, bones, and bats all work too.
Ingredients
- 1 cup 100% pumpkin purée
- 1 large egg
- 1 tablespoon melted virgin coconut oil
- 1/3 cup finely shredded unsweetened coconut
- 2 cups oat flour
- 1/2 cup old-fashioned rolled oats
Instructions
- Preheat the oven to 350°F (175°C).
- Line a baking sheet with parchment paper.
- Add the pumpkin purée, egg, and melted coconut oil to a mixing bowl.
- Stir in the shredded coconut.
- Add the oat flour and rolled oats.
- Mix until a soft dough forms.
- If the dough sticks heavily to your hands, add a little more oat flour.
- Roll it to about 1/3-inch thick.
- Cut out your preferred Halloween shapes.
- Place the treats on the prepared baking sheet.
- Bake for 20 to 25 minutes, or until they feel firm.
- Cool completely before serving.
Tips
- Use plain, finely shredded, unsweetened coconut rather than a sweetened baking blend.
- These biscuits are not as dry as many commercial dog biscuits, so they are better stored in the refrigerator.
- Freeze any portion you will not use within the next few days.
Halloween Dog Treat Recipes: Safety Tips
Some ingredients that are completely normal in human Halloween baking can be dangerous for dogs. Keep human candy and decorating supplies well away from homemade dog treats, especially if you are baking both on the same day.
Avoid using:
- Xylitol, which may also appear on labels as birch sugar
- Chocolate or cocoa
- Grapes and raisins
- Macadamia nuts
- Nutmeg
- Onions
- Garlic
- Alcohol
- Coffee or other caffeine sources
- Candy and sugary Halloween decorations
Peanut butter deserves an extra label check every single time. Any peanut butter used in pumpkin peanut butter dog cookies or other homemade treats should be free from xylitol.
Use 100% pumpkin purée rather than pumpkin pie filling. They may sit next to each other on the grocery shelf, but pumpkin pie filling can contain added sugar and spices you do not want in dog treats.
For frozen recipes, choose plain unsweetened yogurt. Dogs that do not tolerate dairy well are better off with one of the baked options.
How Many Homemade Dog Treats Can a Dog Have?
There is no useful one-size-fits-all number.
A 10-pound dog and a 70-pound dog obviously should not get the same portion, and treat size matters just as much as the number of treats. Age, activity level, usual food intake, medical conditions, and the ingredients in the recipe also affect what makes sense.
How to Store Homemade Halloween Dog Treats
Homemade biscuits do not contain the preservatives used in many packaged products, so they generally will not last as long in the cupboard.
For most of the baked recipes here, refrigeration is the safer storage choice. Drier biscuits may keep for around 5 to 7 days in an airtight container in the refrigerator, while softer pumpkin, banana, sweet potato, and spinach treats should be kept cold and used promptly.
If you have made more than your dog can reasonably eat in several days, freeze the extras.
Most of these baked treats can be frozen for roughly 2 months. Store them in a freezer-safe container, then thaw individual portions in the refrigerator as needed.
Frozen yogurt treats should stay frozen until serving.
If anything smells unusual, develops mold, or seems questionable before the suggested storage time is up, throw it away. Homemade food does not always follow a perfect calendar.
More Ideas for a Dog-Friendly Halloween
Food is only one way to include your dog in Halloween.
You could hide a few homemade biscuits around the house for a simple treat hunt, bring a couple along on an autumn walk, take Halloween-themed photos, or tuck a treat into a pumpkin-shaped enrichment toy.
Your dog’s personality should decide how involved they are in the rest of the celebration.
Some dogs think visitors are the greatest thing that has ever happened. Others find costumes, repeated doorbells, excited children, and unfamiliar people stressful. If your dog falls into the second group, a quieter room away from the front door may be a much better Halloween plan.
That approach still counts as including your dog in the celebration.
Frequently Asked Questions About Halloween Dog Treat Recipes
Are homemade Halloween dog treats safe for dogs?
Homemade treats can be a suitable occasional snack when they use dog-appropriate ingredients and portions. Avoid ingredients that are unsafe for dogs, and check with your veterinarian if your dog has dietary restrictions or medical conditions.
Can dogs eat pumpkin in homemade treats?
Plain 100% pumpkin purée is commonly used in homemade dog treats. Avoid pumpkin pie filling because it may contain added sugar and spices that are unnecessary or unsuitable for dogs.
Can I use peanut butter in Halloween dog treats?
You can use peanut butter if the ingredient list does not contain xylitol or birch sugar. Choose a plain variety and keep the amount moderate because peanut butter is calorie-dense.
How long do homemade dog treats last?
Storage time depends on moisture and ingredients. Many baked treats in this collection are best refrigerated and used within about 5 to 7 days, while extras can often be frozen for longer storage.
Making your own Halloween dog treat recipes is mostly about taking familiar dog-friendly ingredients and having a little fun with the shape.
You can go all in with pumpkin-shaped dog biscuits for Halloween, make frozen monster eyes, score jack-o’-lantern faces into sweet potato dough, or simply use a bat cutter on your usual biscuit recipe. None of it needs to look bakery-perfect.
The cookie cutter is doing most of the visual heavy lifting anyway.
What matters more is using appropriate ingredients, keeping portions sensible, storing the treats safely, and paying attention to how your individual dog handles new foods.
Pick one recipe that sounds manageable and make a small batch first. If your dog likes it, you have a Halloween tradition worth repeating next year.