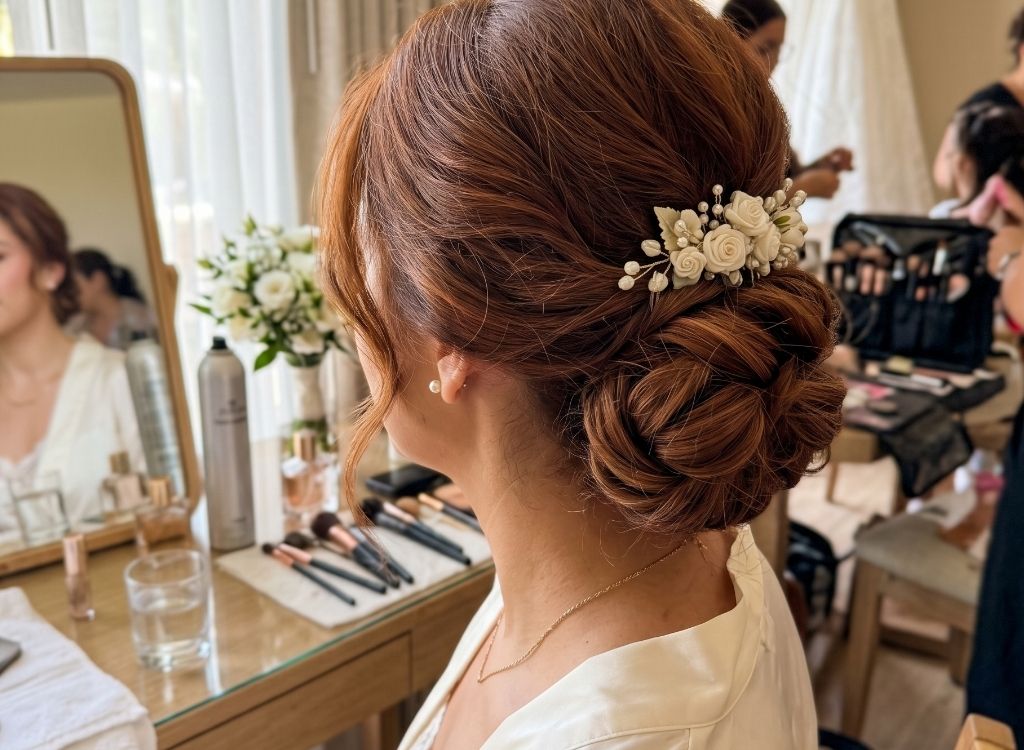
If you’re searching for wedding day updo hairstyles, you’re probably trying to solve a few things at once. You want something that looks beautiful in photos, works with your dress, and still holds through hugs, dancing, and a full day of moving around.
That’s the real challenge.
A beautiful updo wedding hairstyle usually is not about doing something wildly complicated. It’s more about smart prep, solid pin placement, and picking a shape that actually fits your vibe.
Below, you’ll find 22 hair up hairstyles for weddings, mostly buns and twists that feel elegant without being impossible. The goal is simple: styles you can genuinely picture wearing and, in plenty of cases, practicing at home.
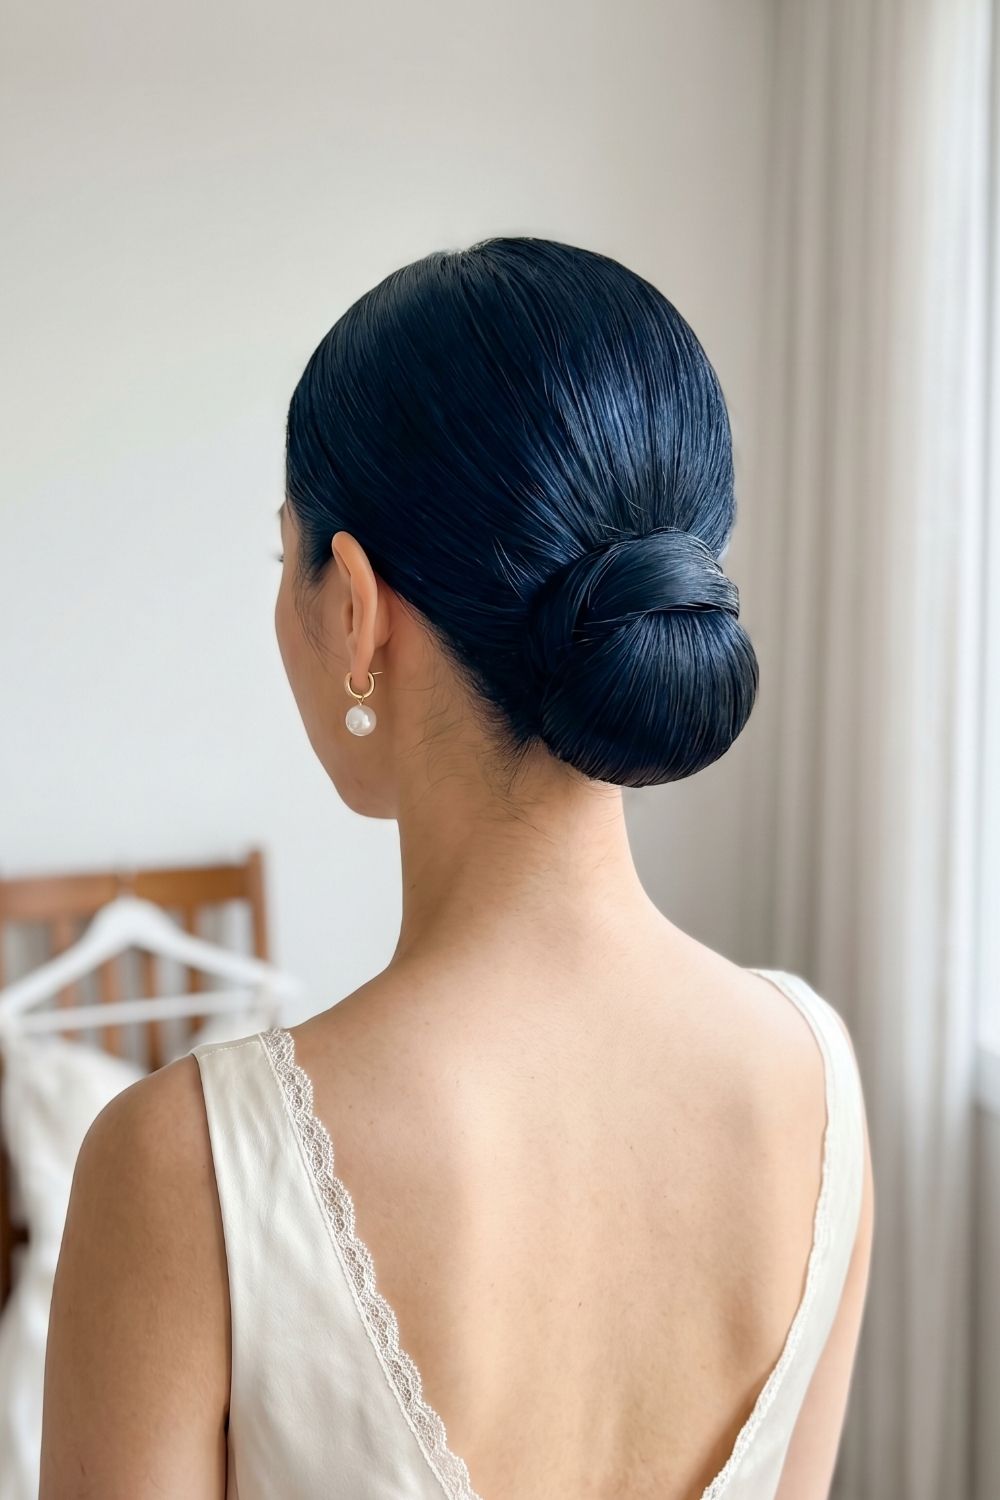
How to recreate it
- Create a clean middle part or a soft side part.
- Smooth the hair down with a brush and a lightweight styling product.
- Gather everything into a low ponytail at the nape.
- Twist the ponytail into a compact bun and pin it tightly.
- Wrap a small section of hair around the base to hide the elastic.
- Finish with strong-hold hairspray and a touch of serum for shine.
Tip
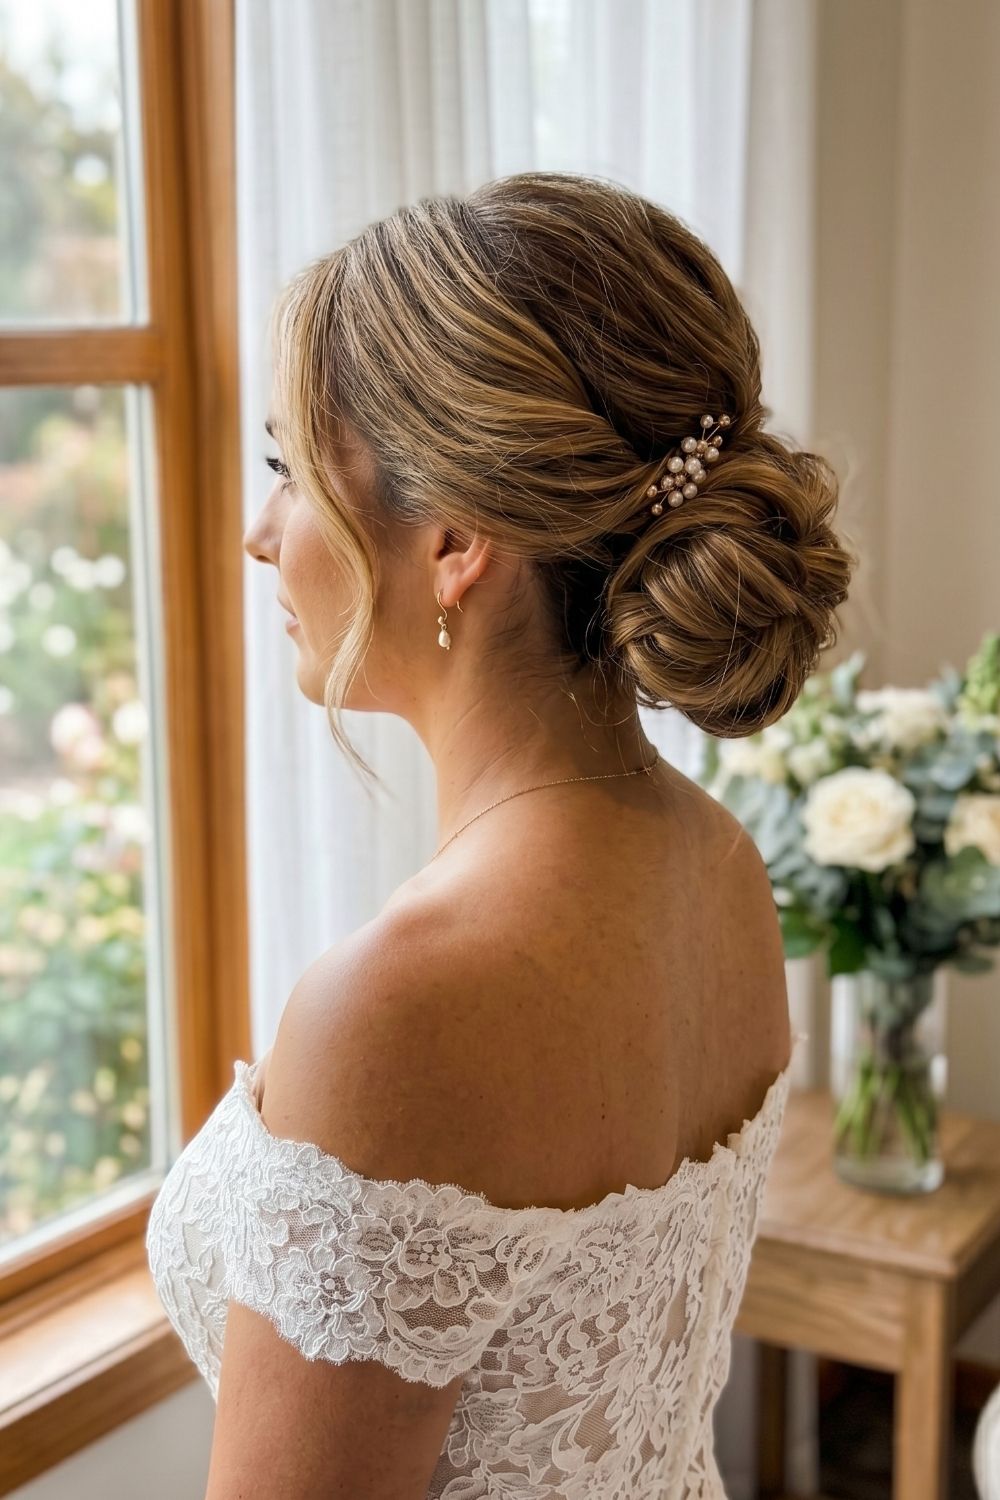
How to recreate it
- Curl the hair lightly to create movement and grip.
- Tease the crown a little for volume.
- Smooth the top layer over the teasing so it does not look stiff.
- Leave a few front pieces out.
- Gather the rest into a low ponytail.
- Twist and pin the ponytail into a loose bun.
- Pull a few sections gently for softness.
- Place a pearl pin above or beside the bun.
Tip
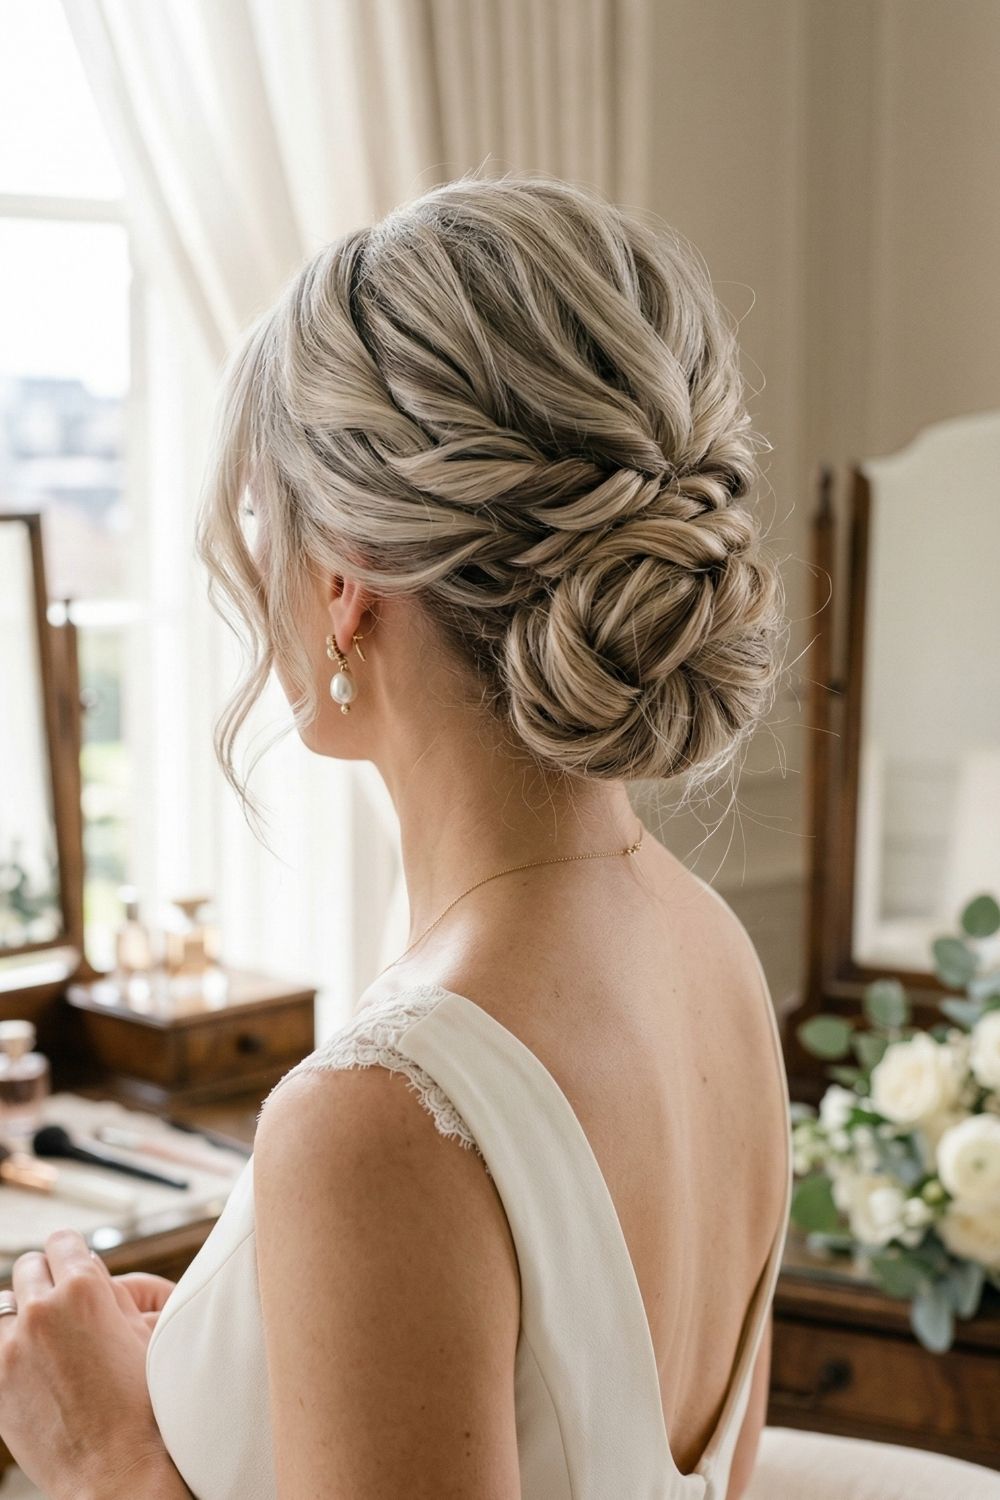
How to recreate it
- Add loose waves throughout the hair.
- Take the two front sections and twist them back on each side.
- Secure those twists near the back of the head.
- Gather the remaining hair into a low ponytail.
- Twist and coil the ponytail into a loose bun.
- Pin section by section instead of trying to pin it all at once.
- Gently pull on the twists and bun for a fuller finish.
Tip
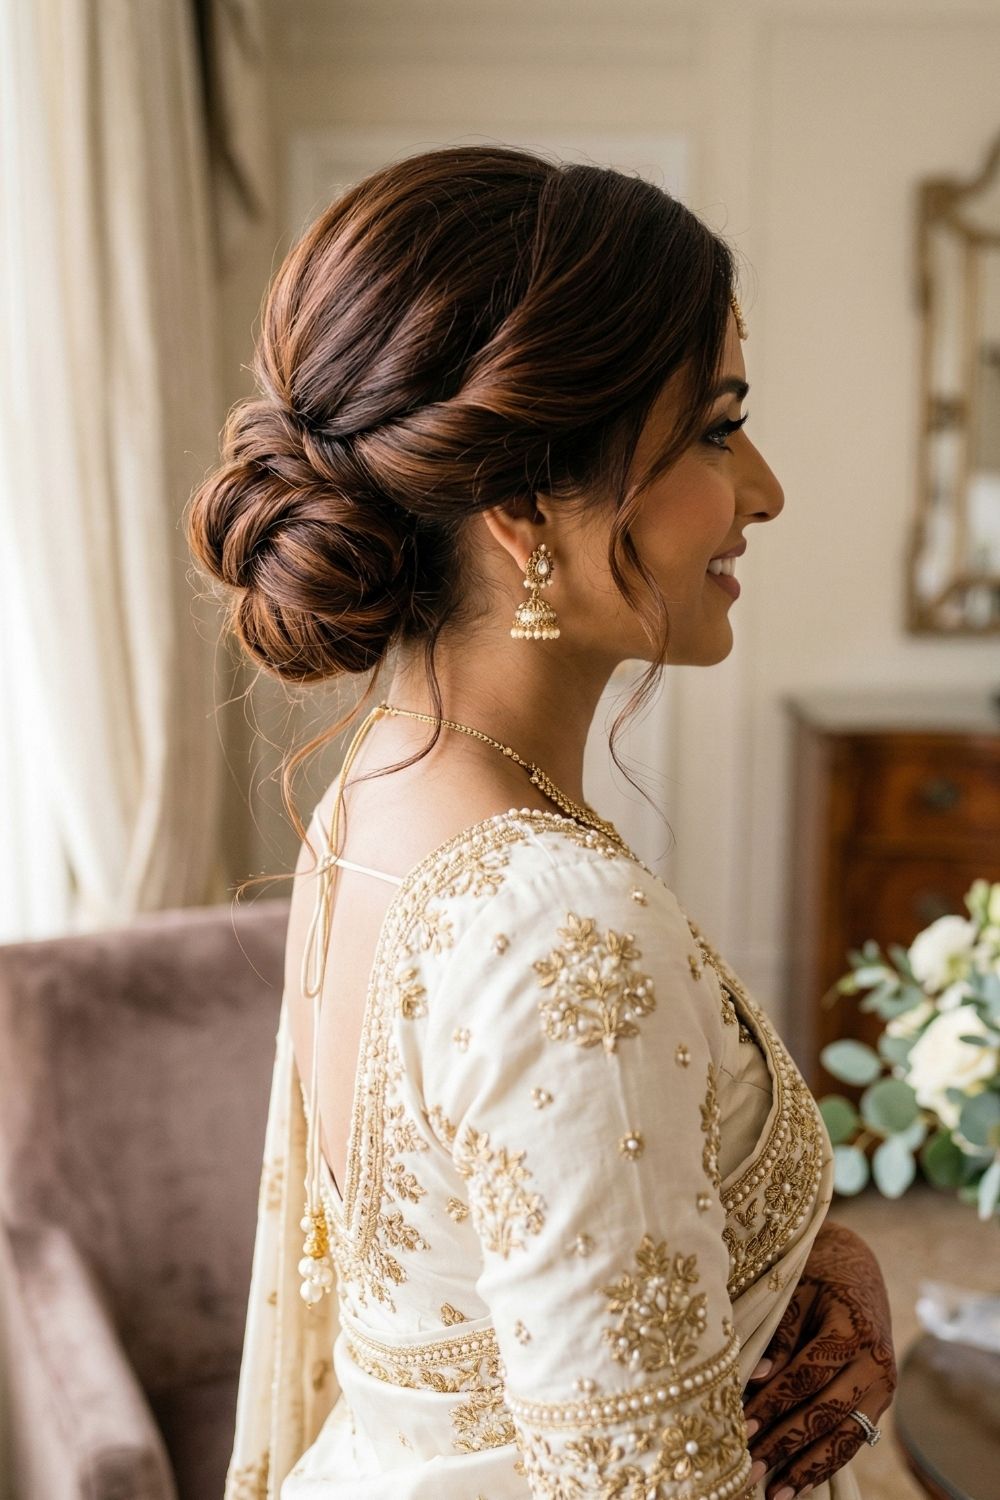
How to recreate it
- Blow-dry or smooth the hair so the surface looks glossy.
- Create a center part or a soft side part.
- Leave out a few face-framing strands.
- Twist the front sections back toward the nape.
- Secure the twists.
- Gather the rest into a low ponytail.
- Wrap the ponytail into a rounded bun and pin it in place.
- Finish with hairspray.
Tip
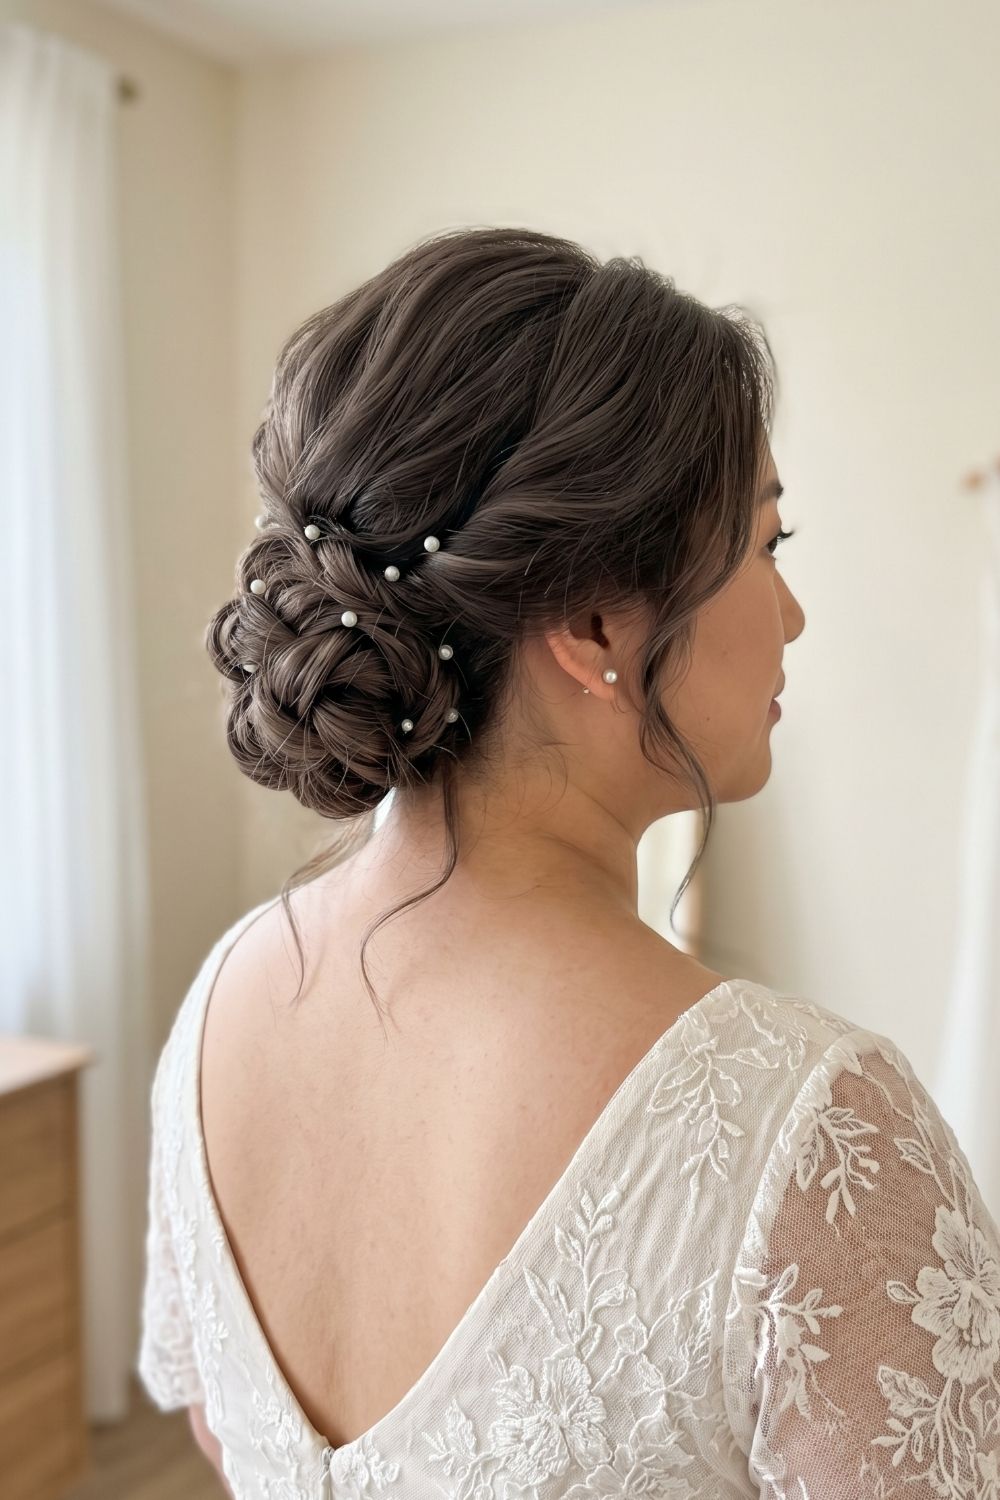
How to recreate it
- Curl the hair loosely first.
- Take the front and side sections and twist them gently toward the back.
- Secure those sections near the nape.
- Gather the rest into a low ponytail.
- Shape the ponytail into a soft bun.
- Pin loosely so the bun keeps some volume.
- Add small pearl pins throughout the twists and bun.
- Pull out a few fine strands around the face.
Tip
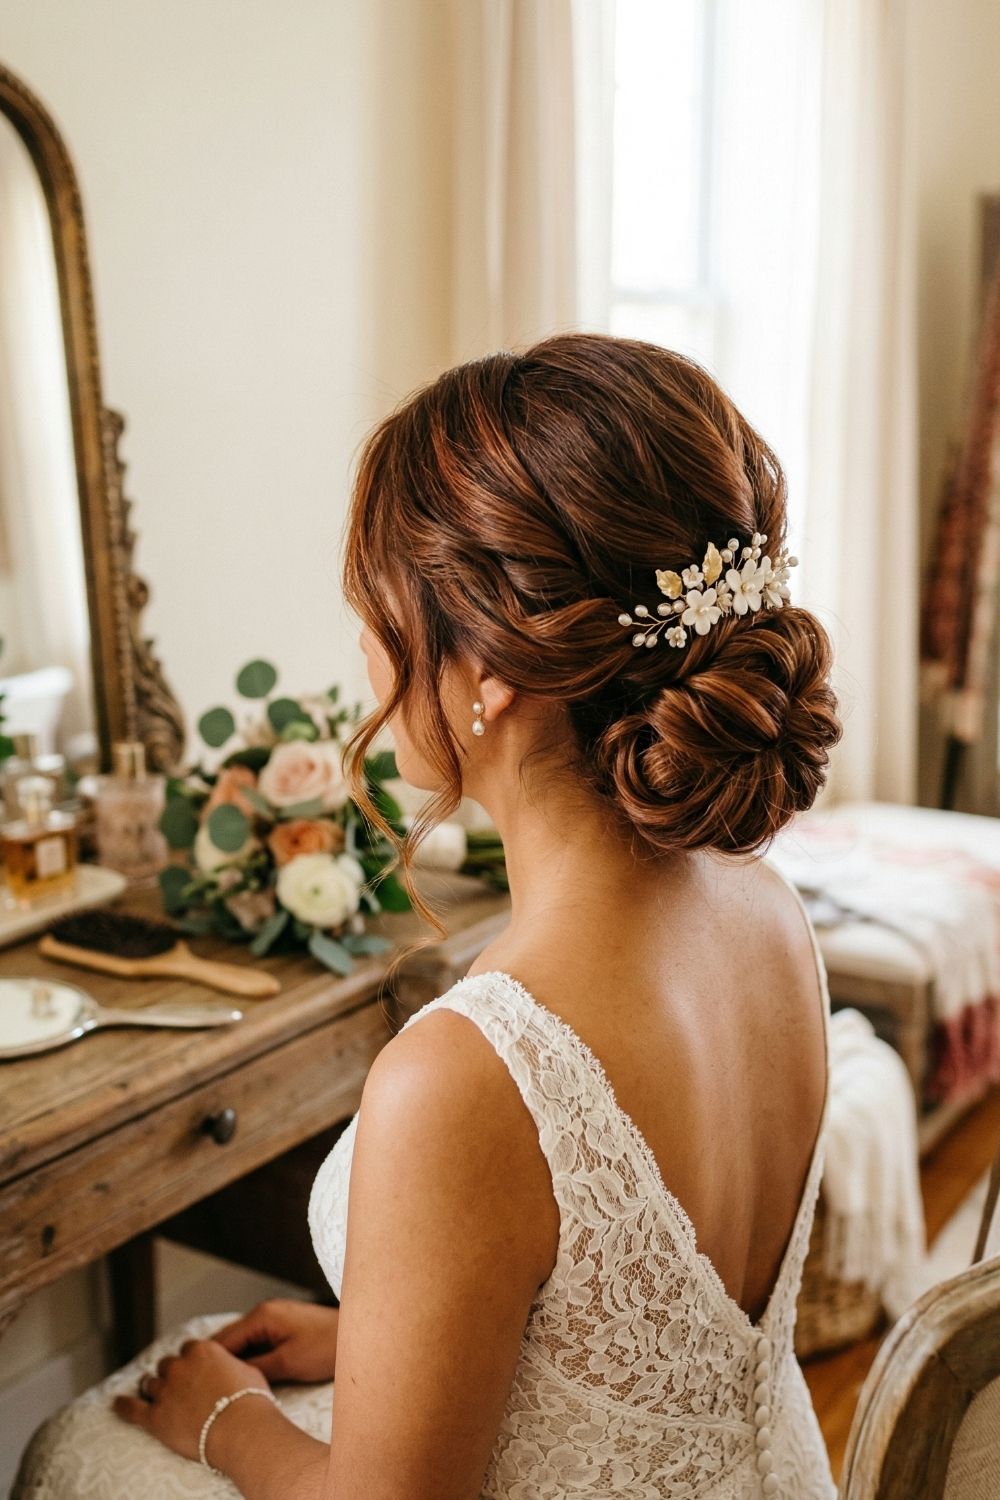
How to recreate it
- Curl the hair lightly for texture.
- Leave a few front pieces out.
- Twist the side sections toward the back.
- Gather the rest into a low ponytail.
- Shape that ponytail into a textured bun.
- Pin loosely so the twists and loops stay visible.
- Place a floral or pearl vine just above the bun.
Tip
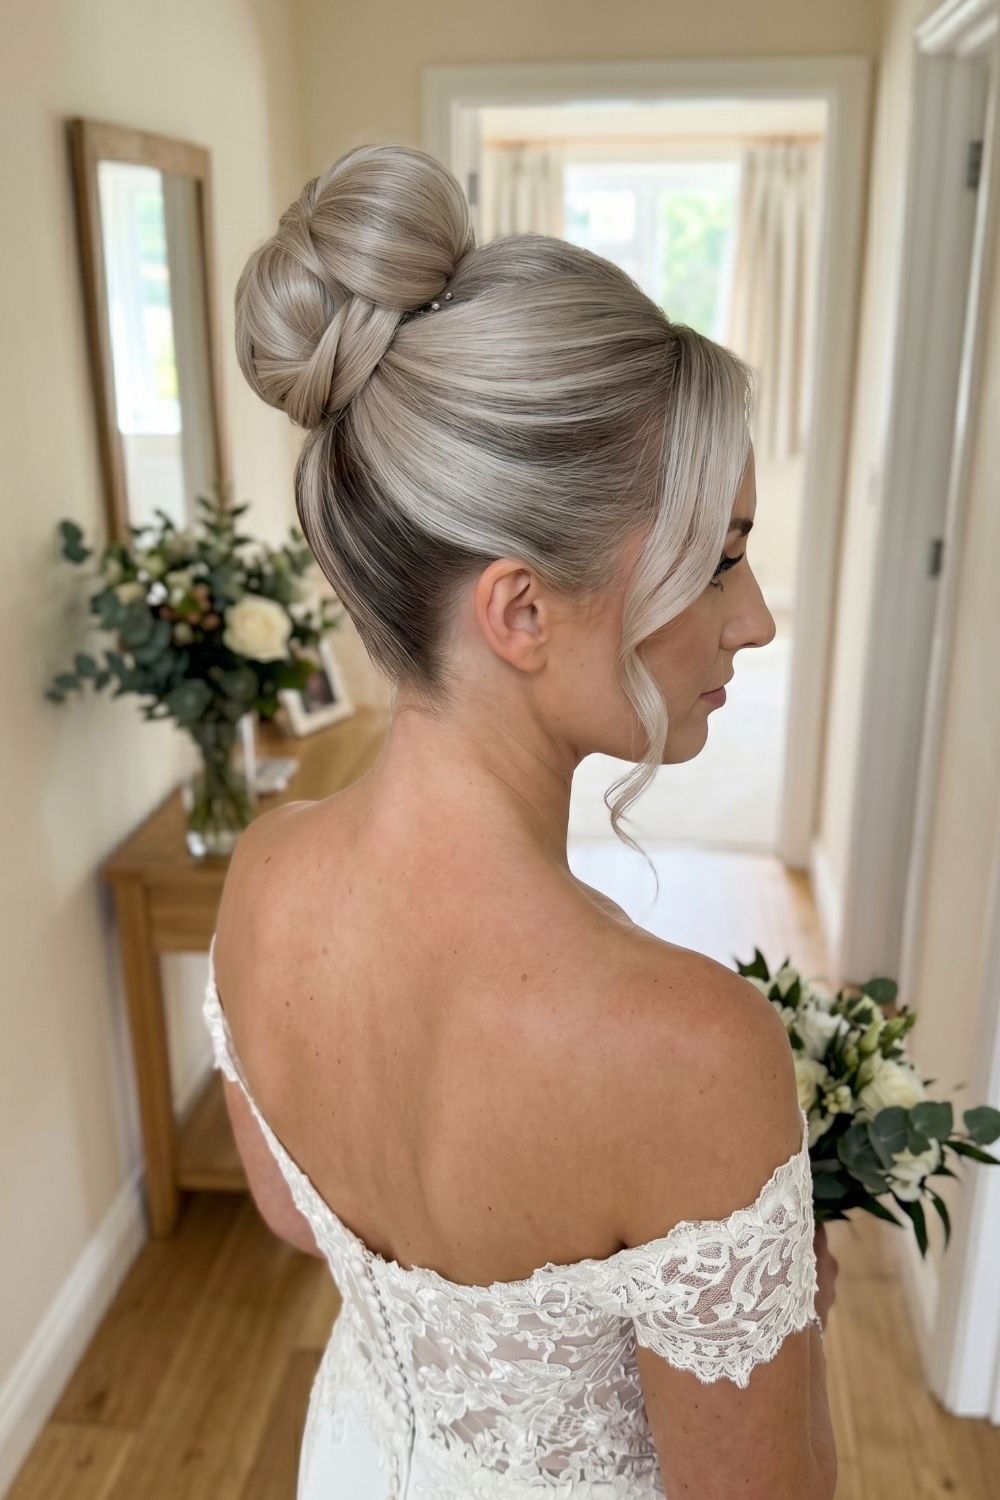
How to recreate it
- Smooth the hair with a brush and styling cream.
- Gather everything into a high ponytail.
- Wrap the ponytail around a bun form or twist it into a full bun.
- Pin securely all the way around.
- Take a small section of hair and wrap it around the base.
- Smooth the surface with hairspray or serum.
- Leave one or two front strands loose and curl them lightly.
Tip
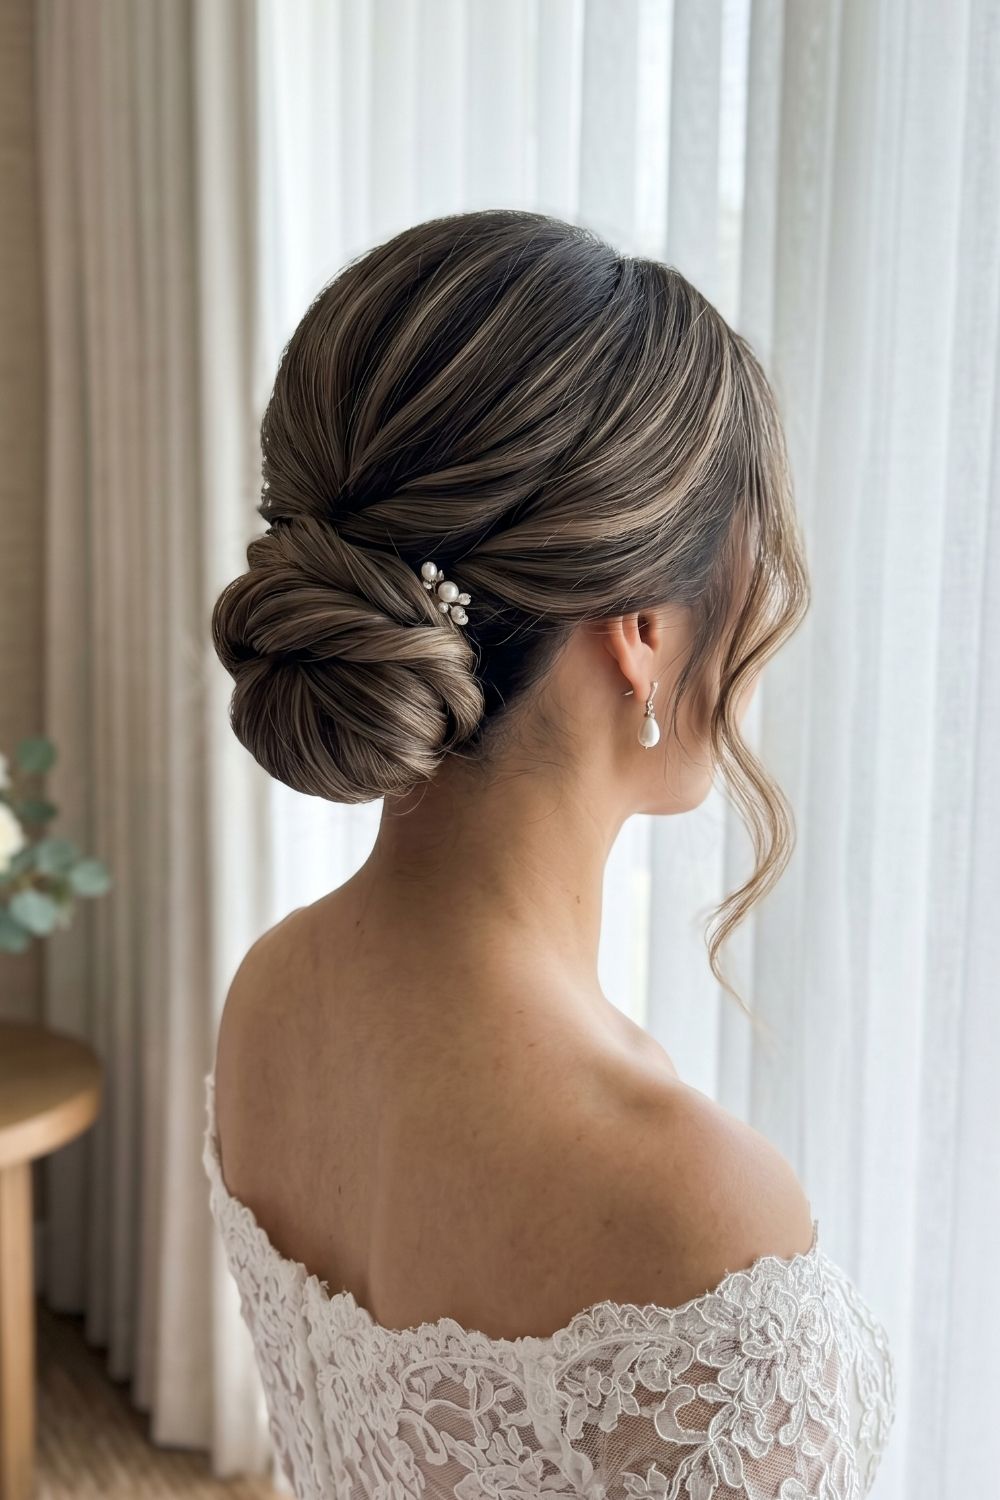
How to recreate it
- Smooth the hair with a brush and lightweight styling cream.
- Leave out one or two front sections.
- Gather the rest low at the nape.
- Twist into a rounded bun and pin securely.
- Wrap a section of hair around the bun for a seamless finish.
- Add a pearl pin or small clip near the side.
- Curl the front piece softly.
Tip
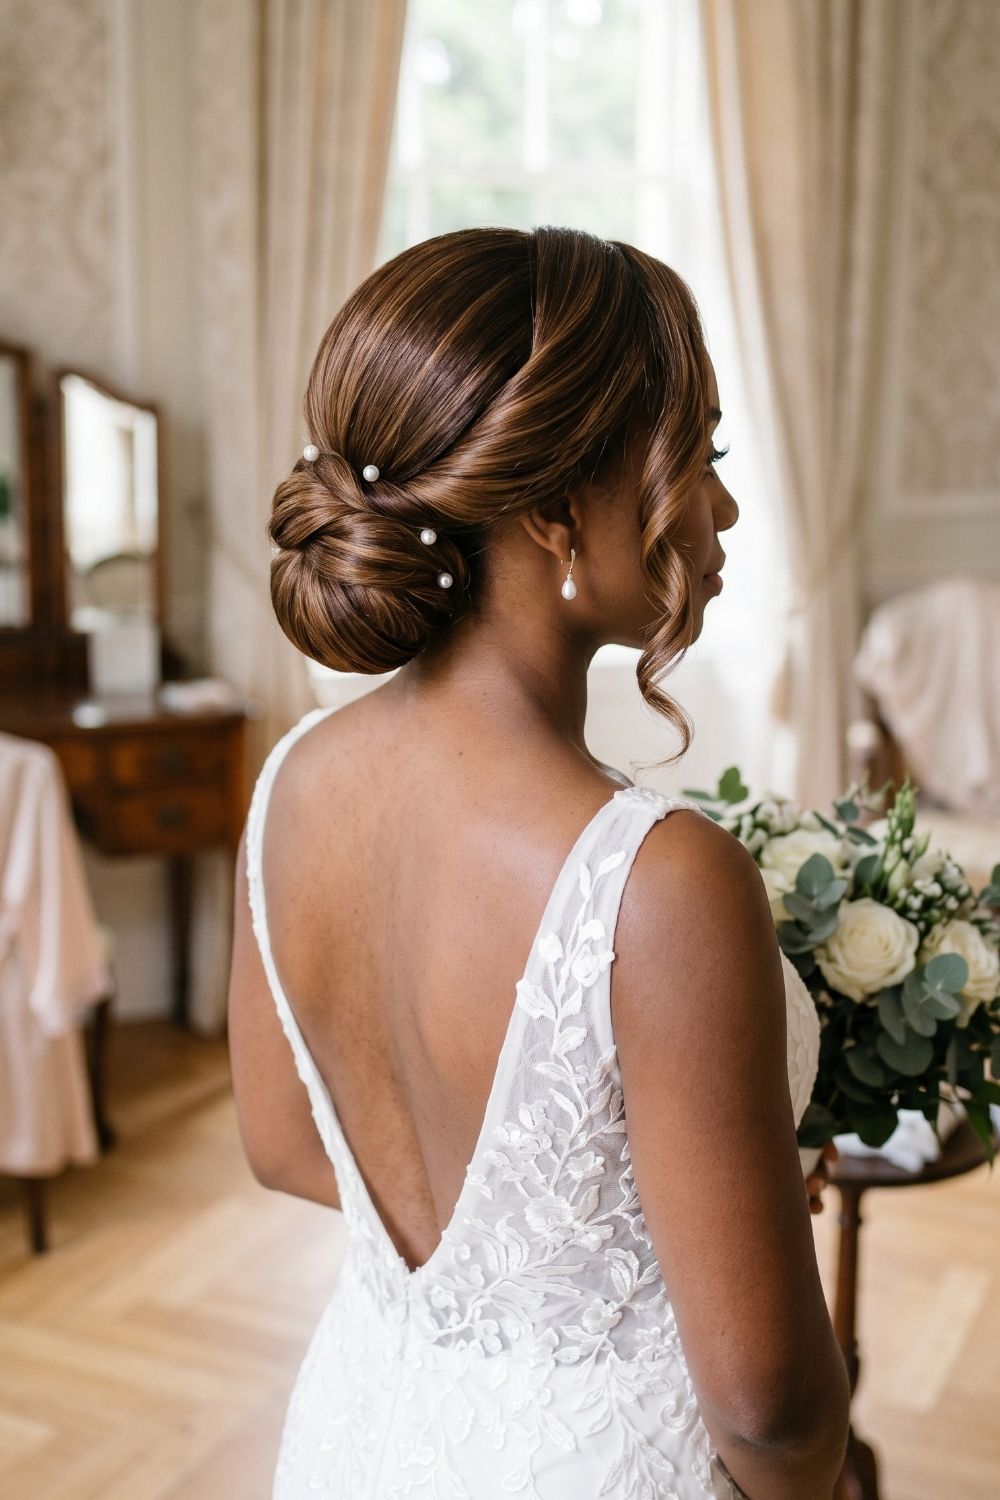
How to recreate it
- Straighten or smooth the hair first.
- Apply a lightweight styling cream for shine.
- Leave out one front section.
- Sweep the rest into a low ponytail.
- Twist into a neat bun and pin it at the nape.
- Wrap a section over the bun area for a layered finish.
- Add pearl pins along the side.
- Curl the front strand slightly.
Tip
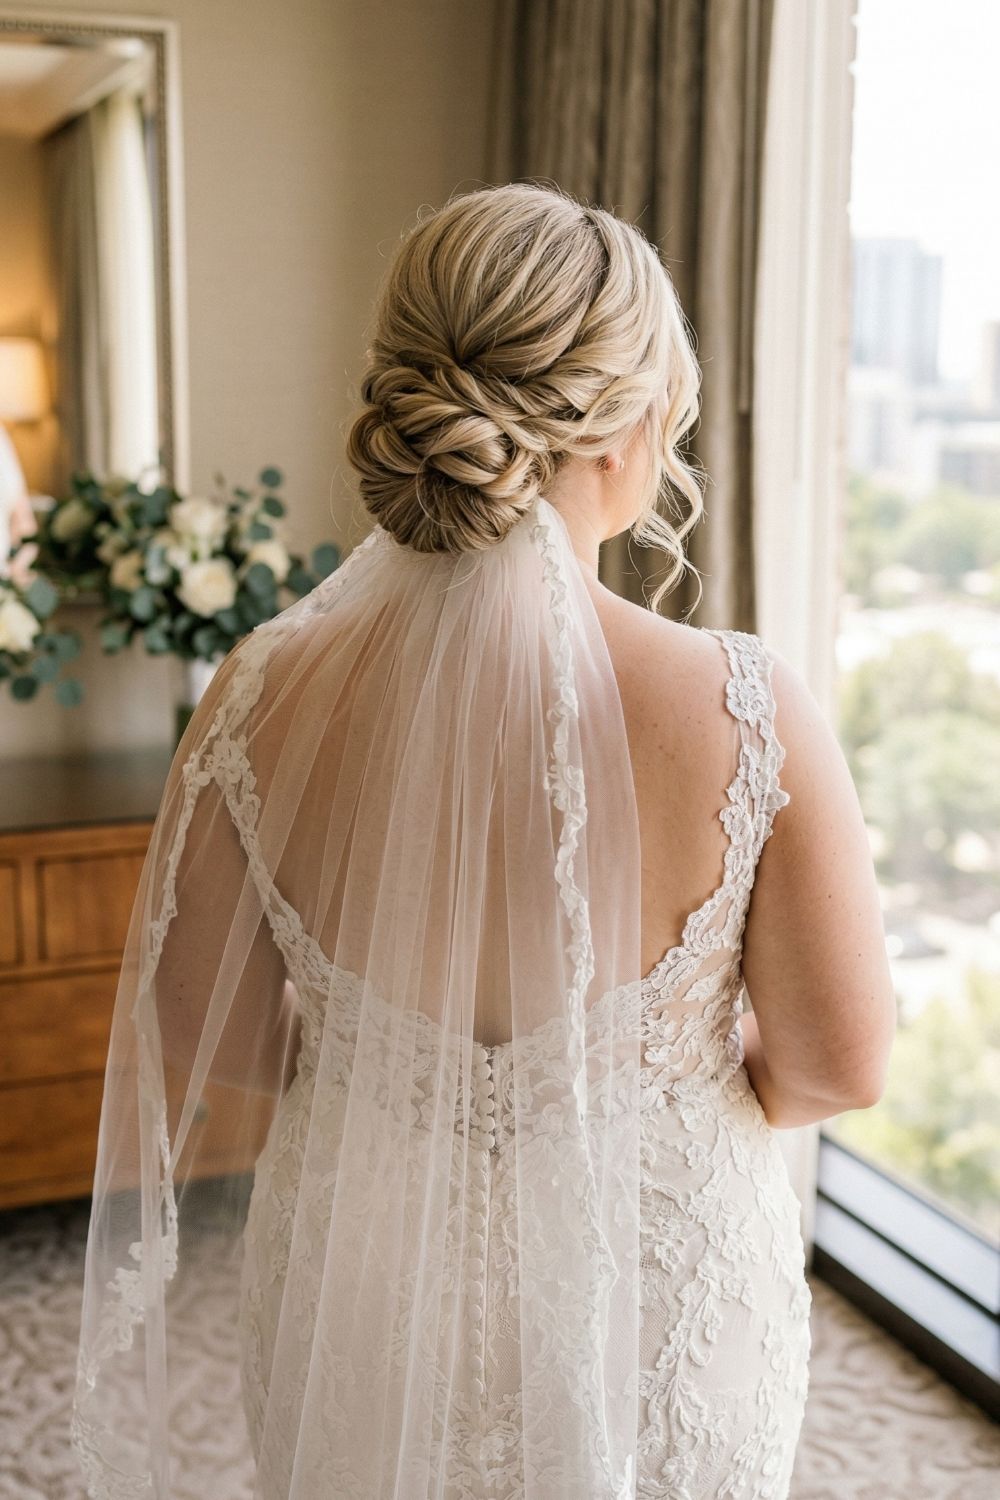
How to recreate it
- Add soft waves through the hair.
- Take the side sections and twist them toward the back.
- Secure them loosely near the nape.
- Gather the remaining hair into a low ponytail.
- Shape it into a textured bun.
- Pin in sections so the twists stay visible.
- Attach the veil above or just below the bun.
- Pull out soft front pieces if you want a more relaxed finish.
Tip
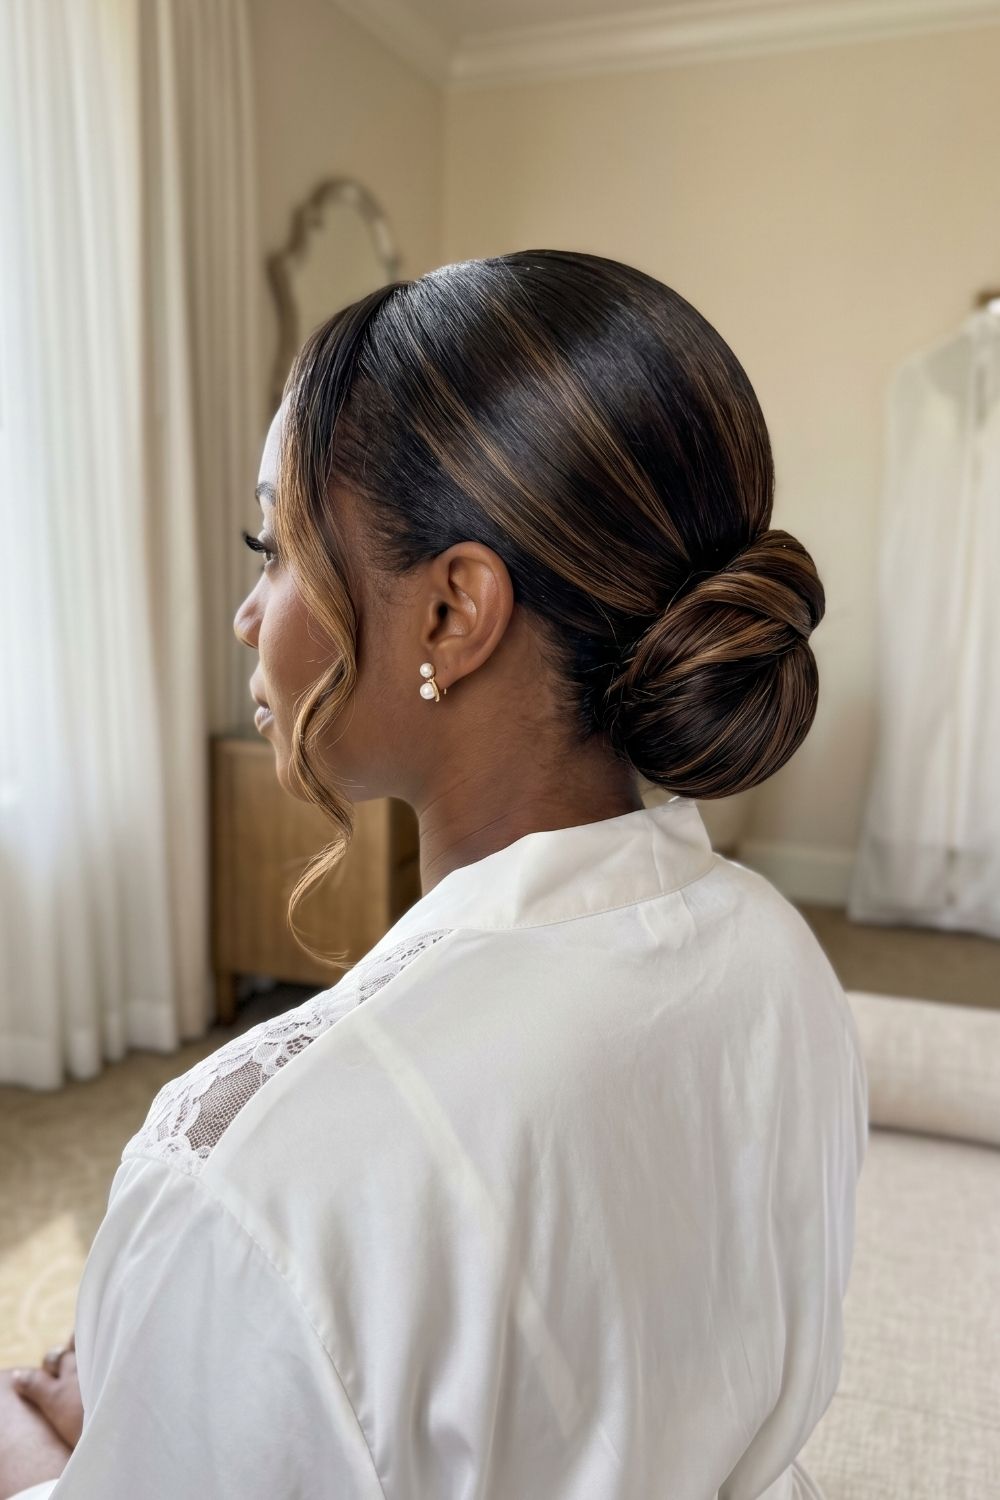
How to recreate it
- Create a deep side part.
- Smooth the hair with styling cream or gel.
- Leave out one face-framing section.
- Brush the rest into a low ponytail.
- Twist into a compact bun and pin it securely.
- Wrap a small piece of hair around the bun base.
- Set everything with strong-hold hairspray.
- Curl the front strand lightly.
Tip
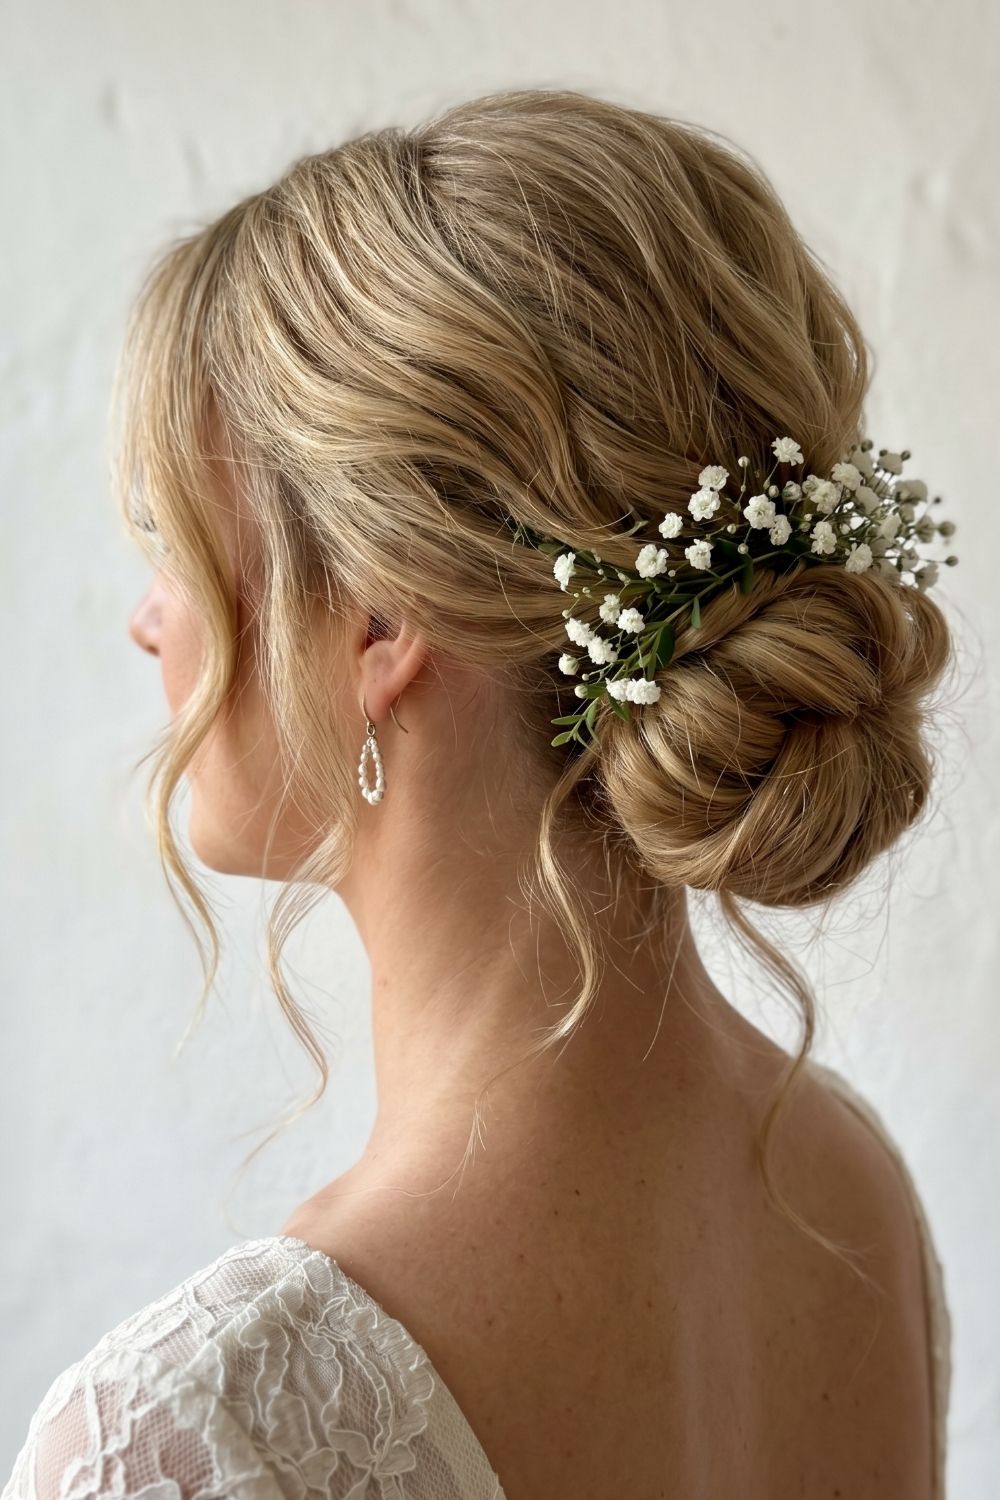
How to recreate it
- Curl the hair loosely.
- Leave out a few front pieces.
- Sweep the rest toward the nape.
- Gather into a low ponytail.
- Twist into a loose bun.
- Pin it so the shape stays soft.
- Pull a few sections for fullness.
- Tuck baby’s breath into one side.
Tip
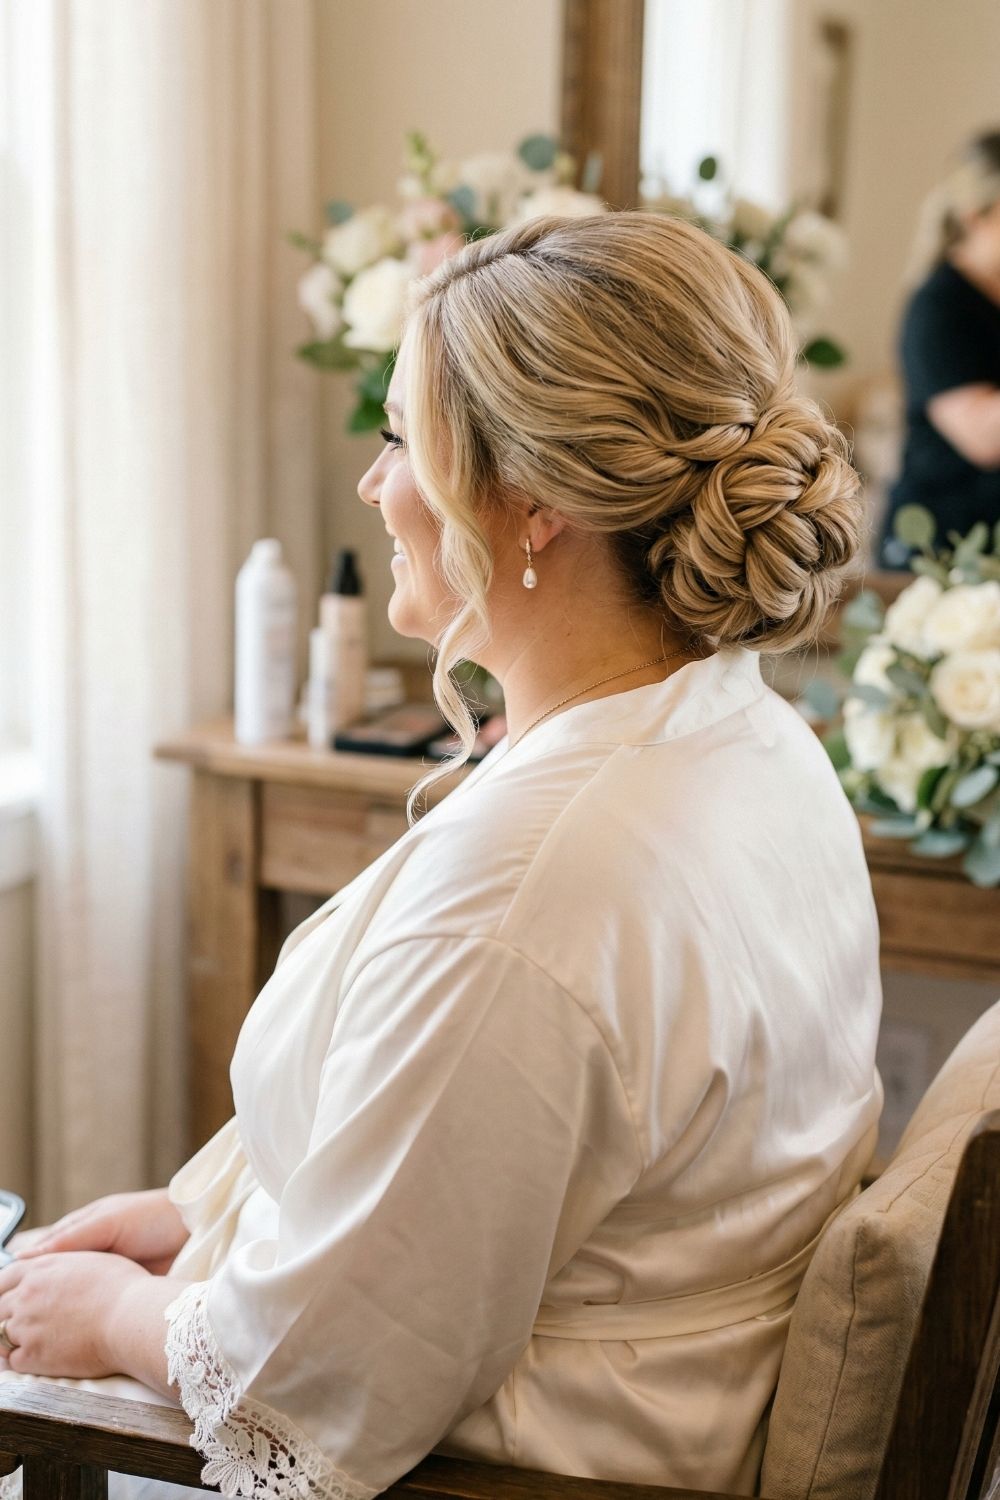
How to recreate it
- Curl loosely to build texture.
- Leave out front pieces.
- Twist the side sections back toward the nape.
- Gather the rest into a low ponytail.
- Coil and pin into a loose textured bun.
- Keep the shape full instead of flattening it down.
- Pull gently on sections for volume.
- Finish with hairspray.
Tip
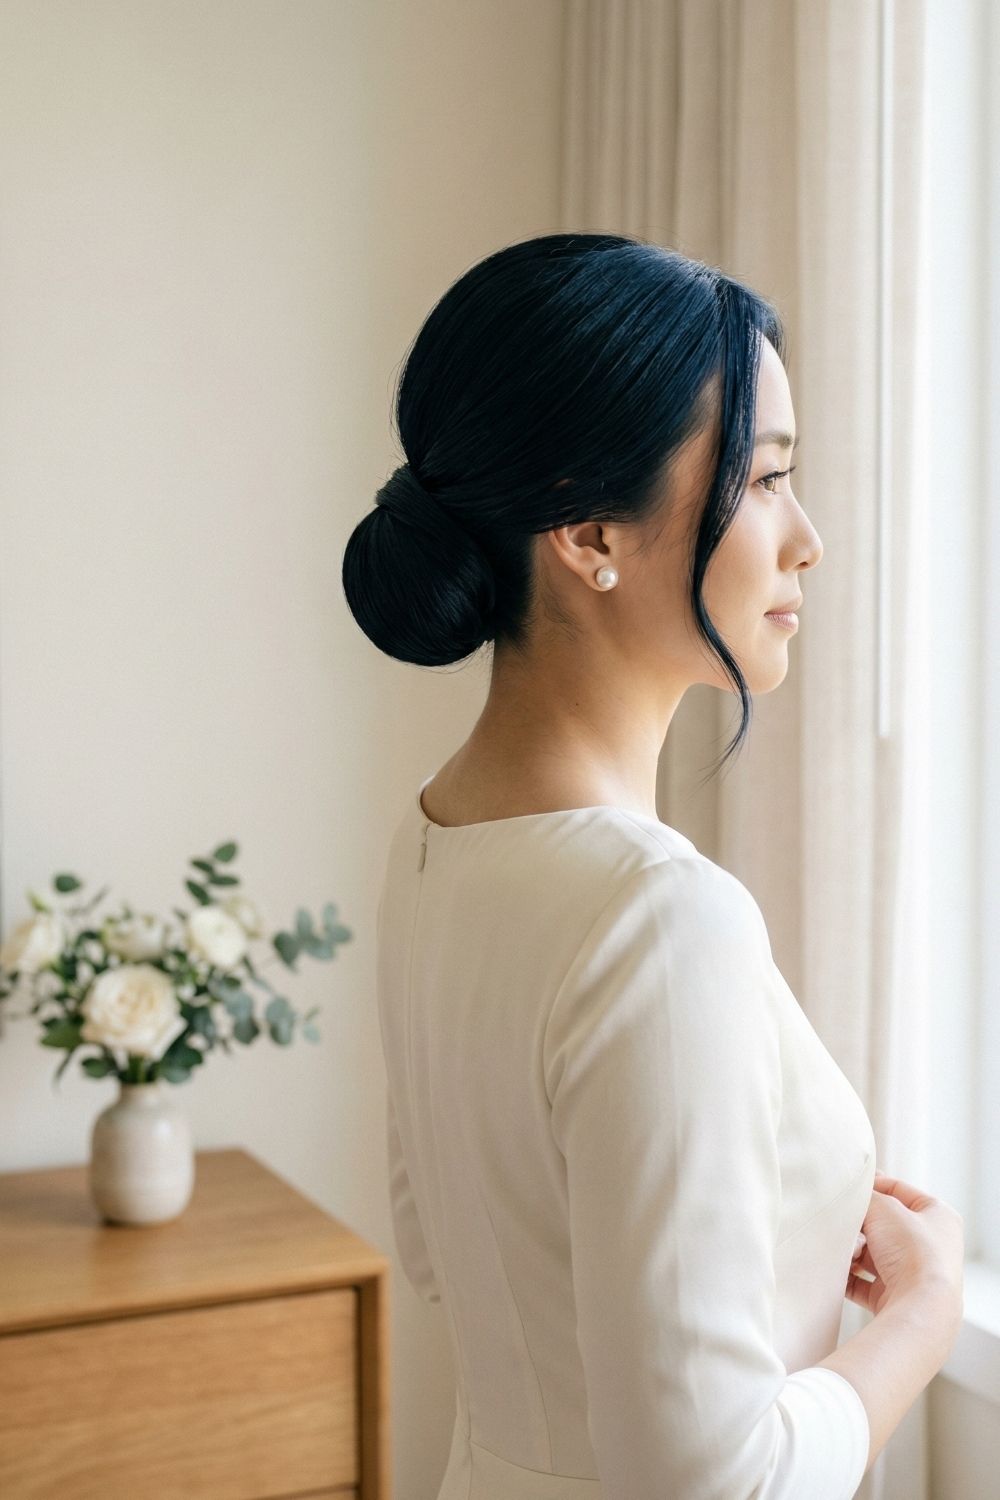
How to recreate it
- Smooth the hair with a brush and styling cream.
- Create a neat center part or soft side part.
- Leave out one front strand.
- Gather the rest into a low ponytail.
- Twist into a compact bun and pin securely.
- Wrap a small section around the base if needed.
- Finish with hairspray or serum.
Tip
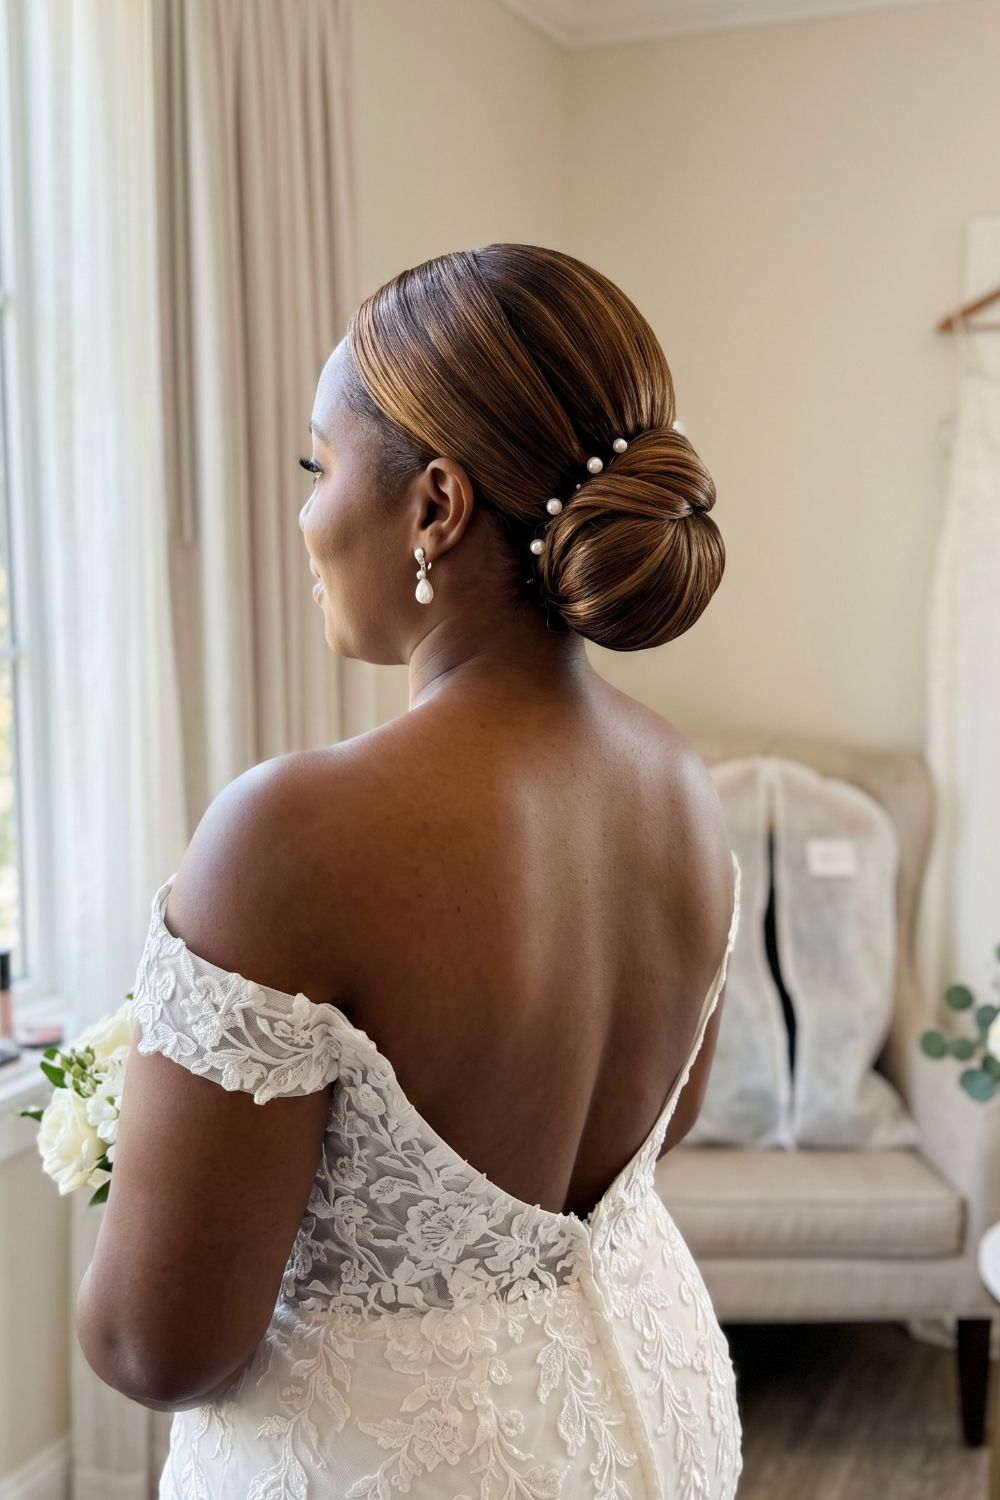
How to recreate it
- Smooth the hair and create a center or side part.
- Gather everything into a low ponytail.
- Keep the top sleek with a brush.
- Twist into a rounded bun and pin it securely.
- Wrap a section around the base.
- Add pearl pins along one side.
- Set with hairspray.
Tip
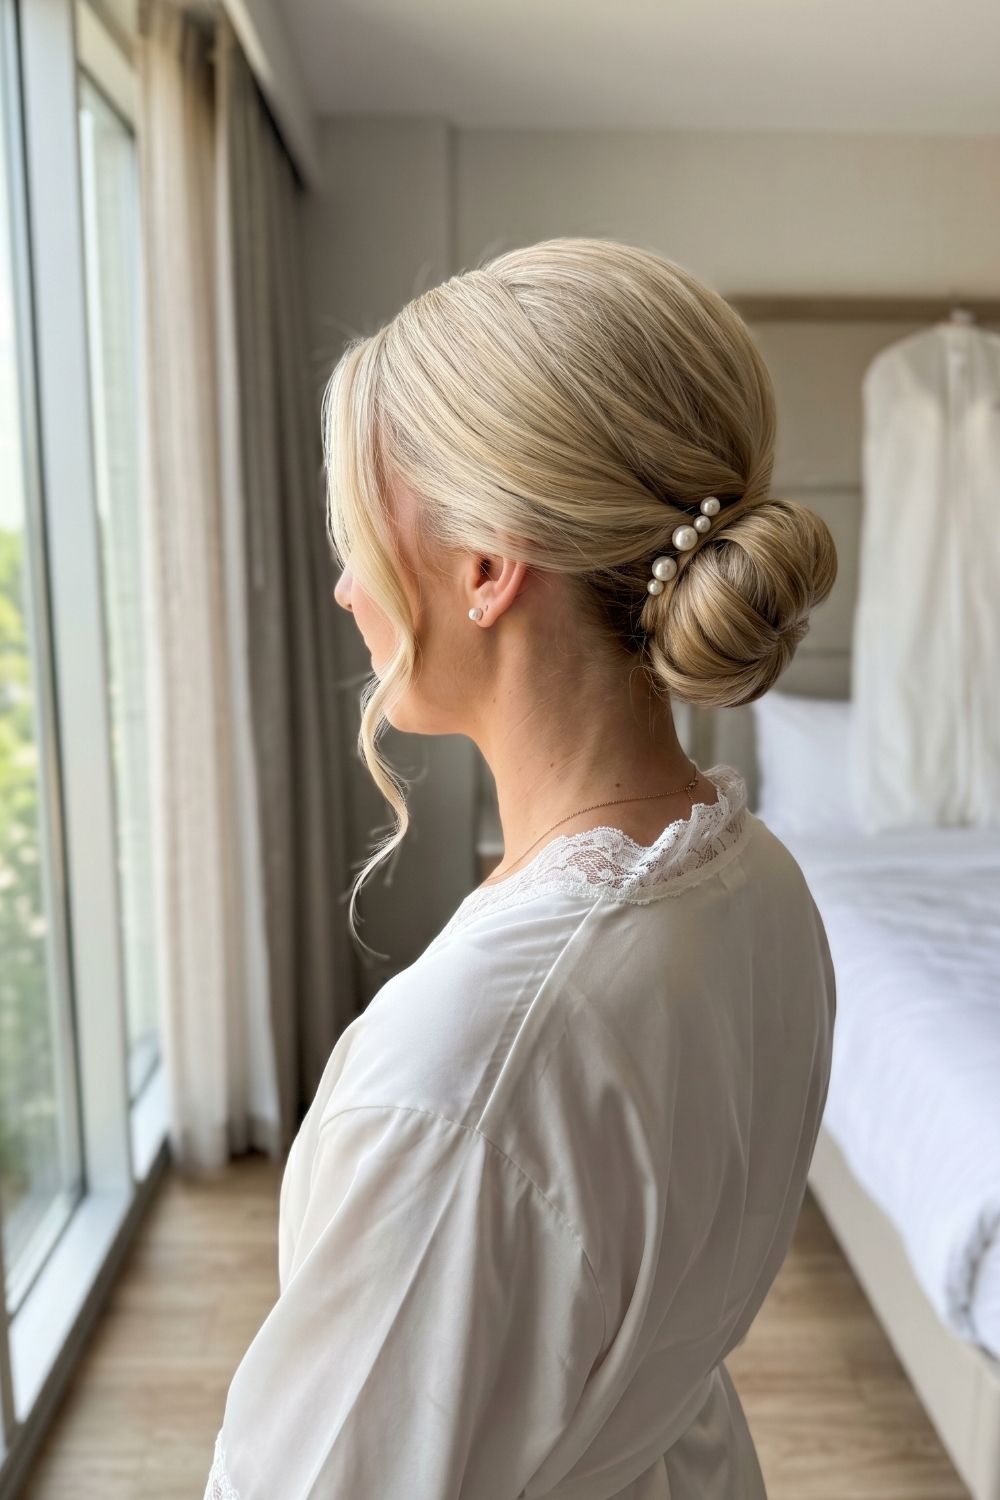
How to recreate it
- Smooth the hair and create a soft side part.
- Leave one front section out.
- Gather the rest into a low ponytail.
- Twist into a rounded bun and pin it in place.
- Wrap a section around the bun for a seamless finish.
- Slide a pearl pin or comb along the side.
- Curl the front piece softly.
Tip
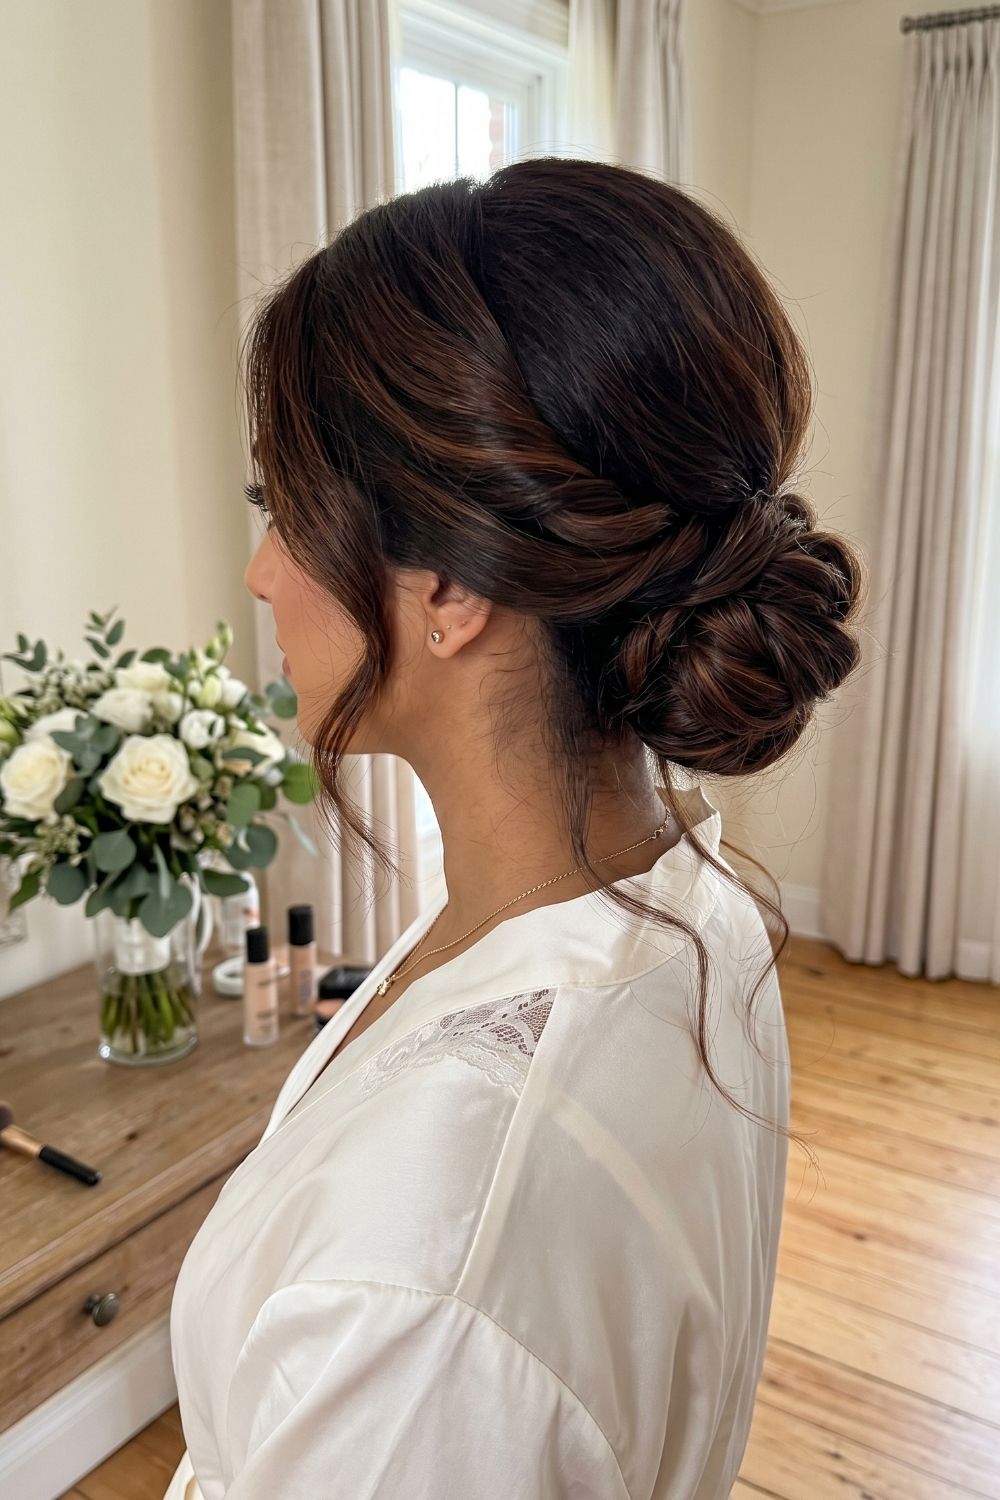
How to recreate it
- Curl the hair loosely first.
- Leave out face-framing pieces.
- Twist the side sections back toward the nape.
- Gather the remaining hair into a low ponytail.
- Coil and pin into a textured bun.
- Keep the loops slightly loose.
- Pull gently for fullness.
- Finish with hairspray.
Tip
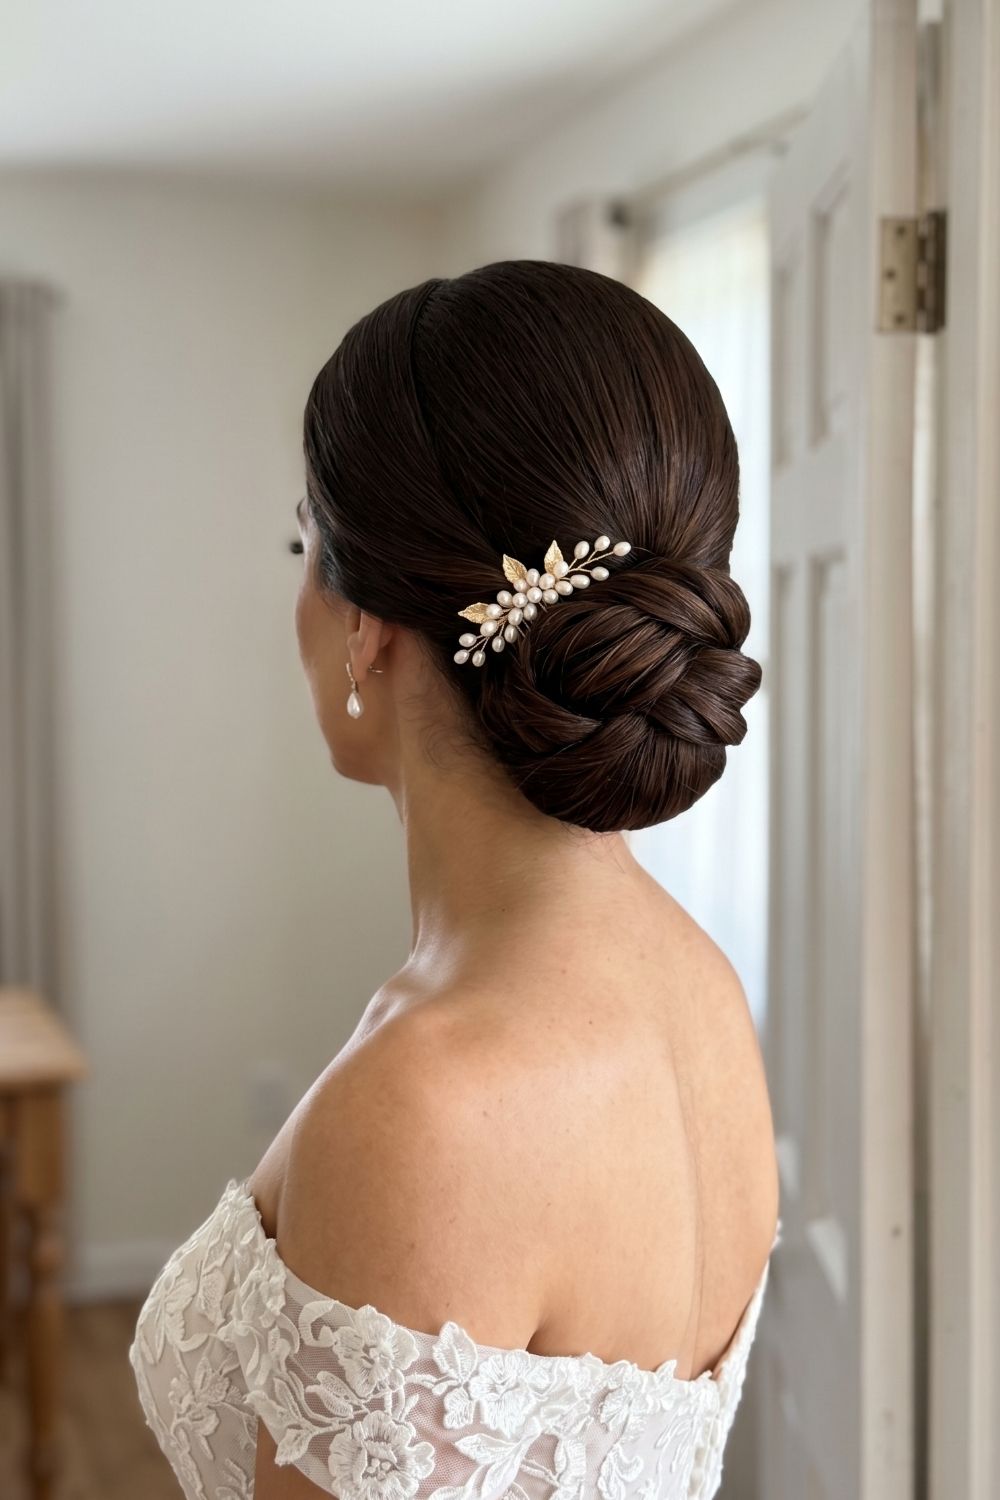
How to recreate it
- Smooth the hair with a brush and styling cream or gel.
- Create a clean center part or soft side part.
- Gather into a low ponytail.
- Twist into a compact bun and pin tightly.
- Wrap a section around the bun to hide the elastic.
- Place a decorative comb just above the bun.
- Set with strong-hold hairspray.
Tip
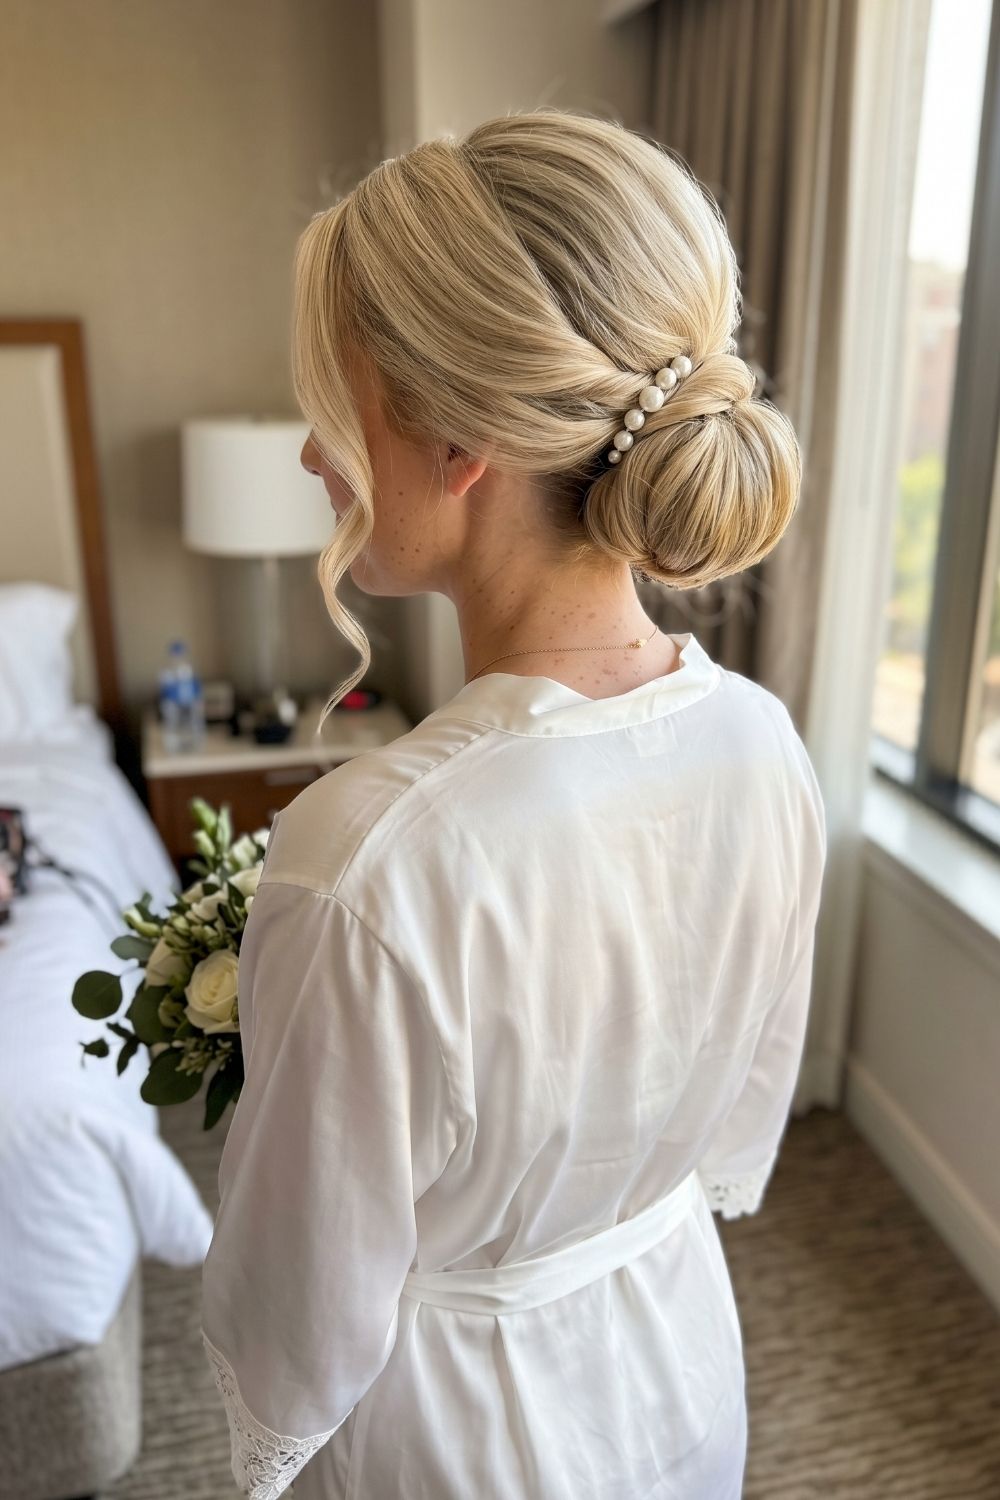
How to recreate it
- Smooth the hair and create a center or soft side part.
- Leave out one front section.
- Gather the rest into a low ponytail.
- Twist into a neat, rounded bun.
- Pin it securely at the nape.
- Wrap a section over the bun area for a smooth layered effect.
- Add a pearl pin or comb along the twist.
- Lightly curl the front piece.
Tip
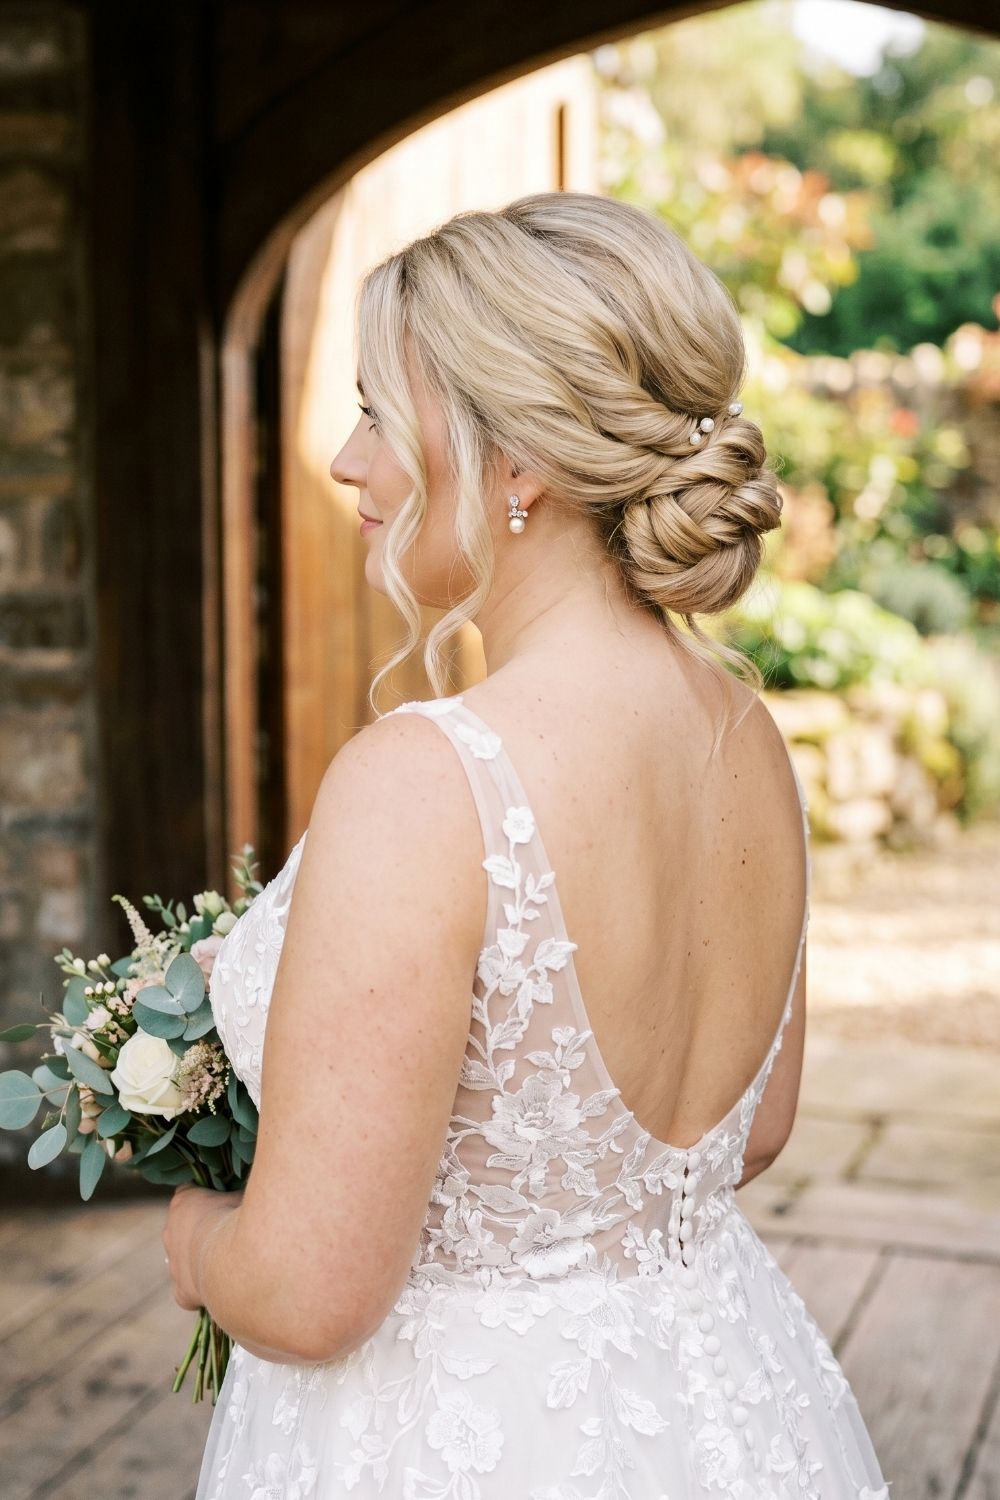
How to recreate it
- Curl the hair loosely for texture.
- Leave out the front sections.
- Twist the sides back toward the nape.
- Gather the remaining hair into a low ponytail.
- Shape into a soft bun.
- Pin in sections so the twists stay full.
- Add a few pearl pins.
- Loosen the front pieces.
Tip
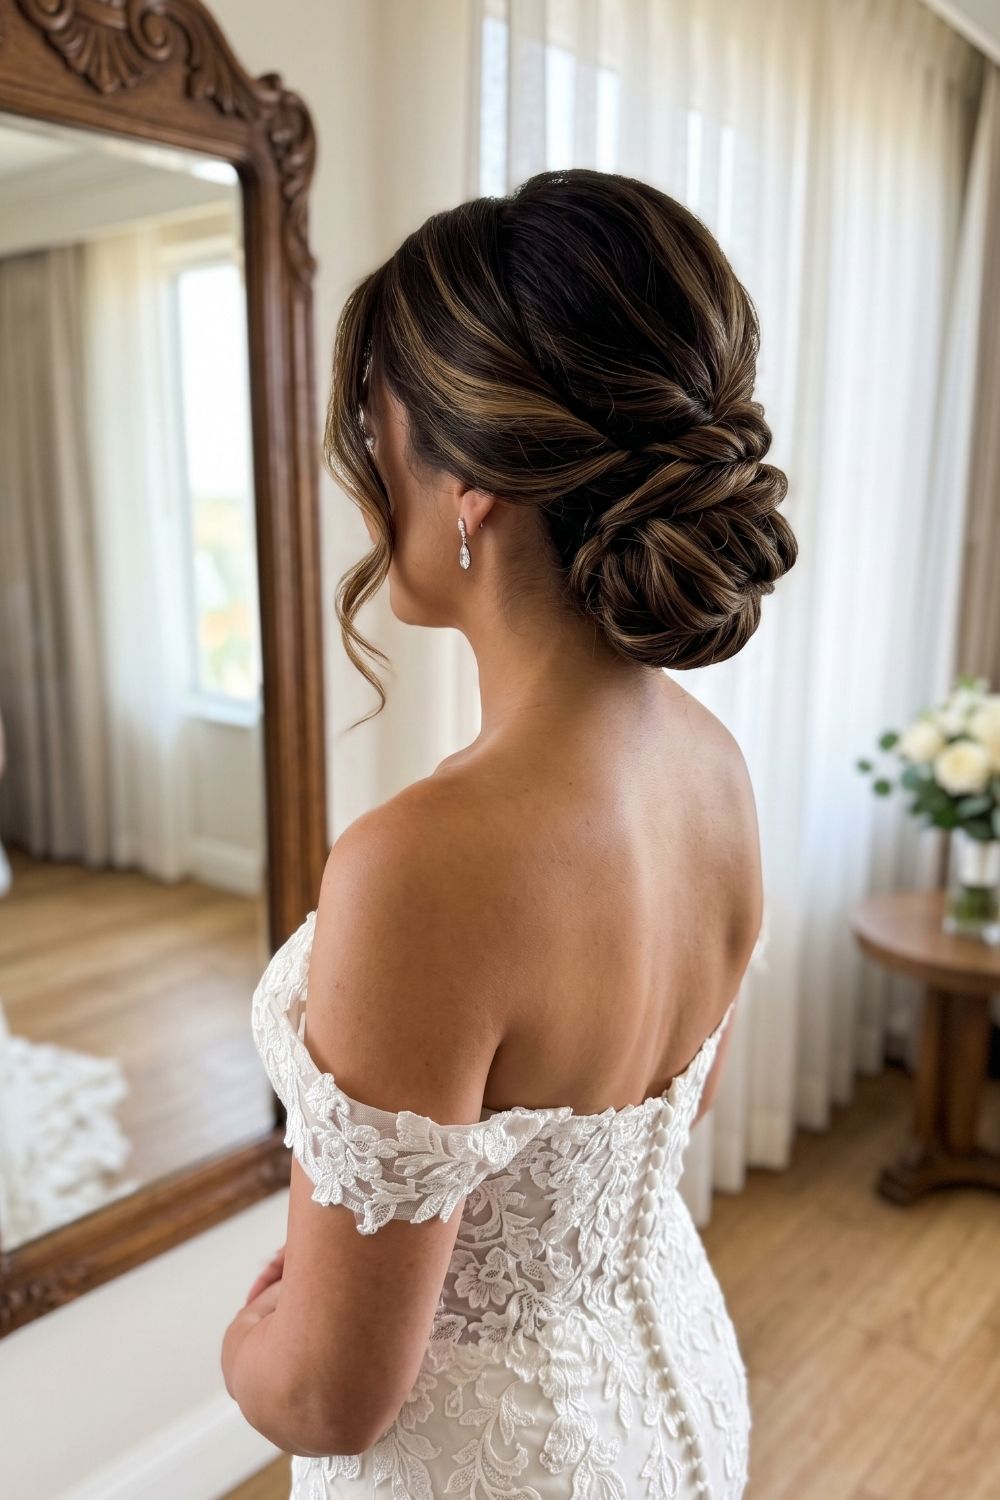
How to recreate it
- Curl loosely for texture.
- Leave out front strands.
- Twist the side sections back toward the nape.
- Gather everything into a low ponytail.
- Coil and pin into a full-textured bun.
- Keep the loops visible.
- Loosen a few sections for fullness.
- Finish with hairspray.
Tip
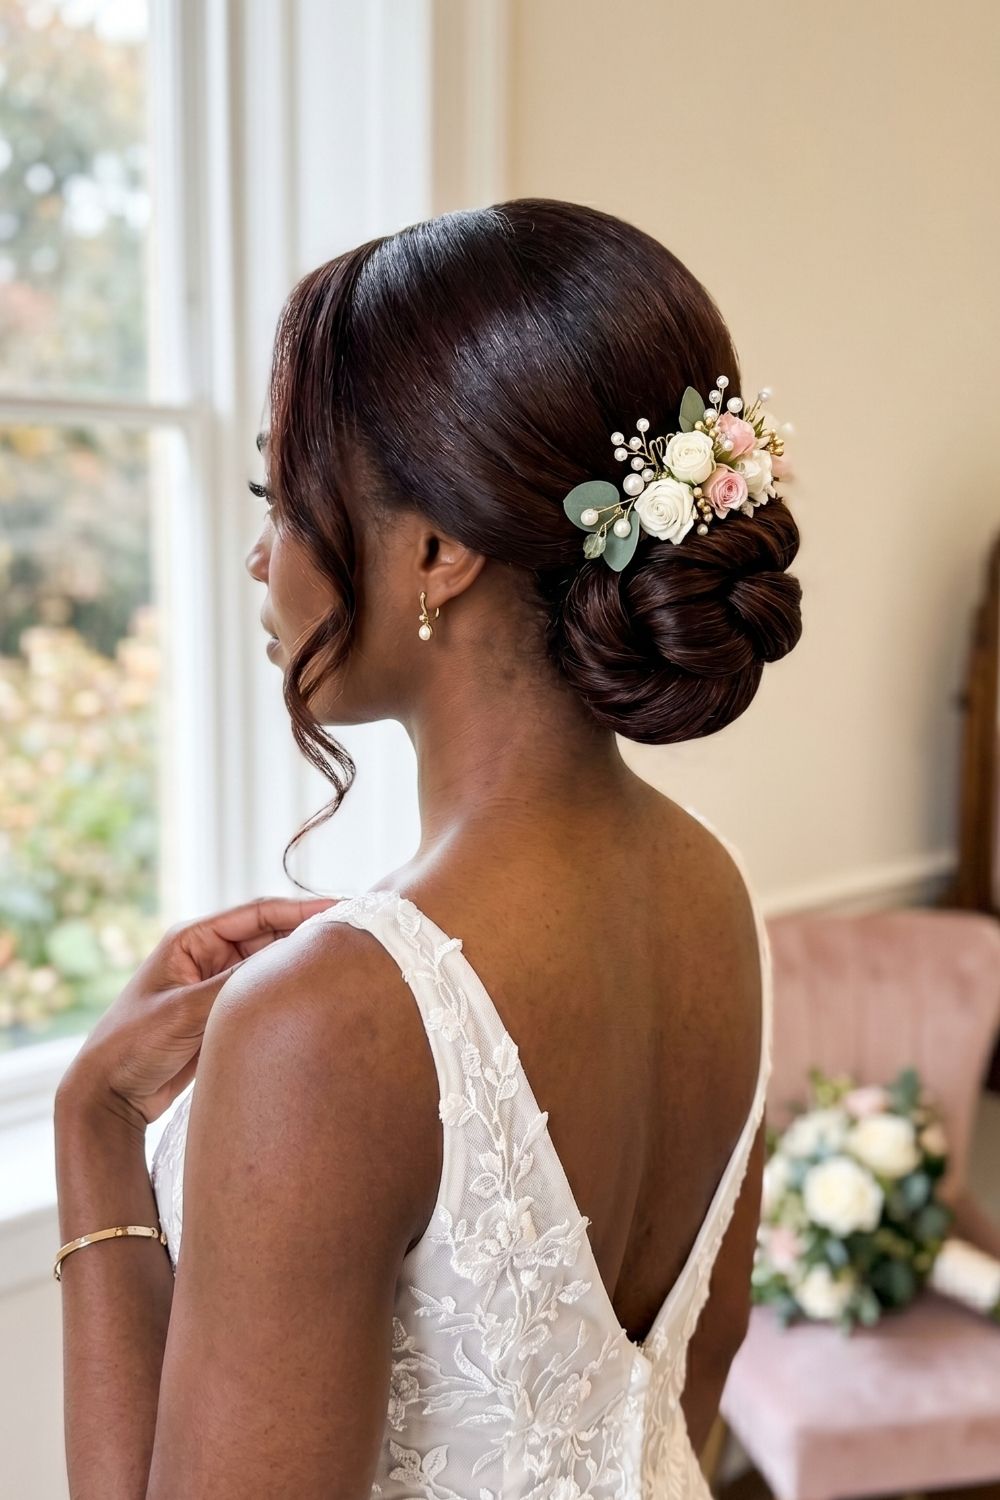
How to recreate it
- Smooth the hair and create a clean side or center part.
- Leave out one front section.
- Gather the rest into a low ponytail.
- Twist into a compact bun.
- Pin securely.
- Wrap a section around the base.
- Add a floral comb or floral pins to one side.
- Curl the front strand lightly.
Tip
Common Mistakes to Avoid With Hair Up Hairstyles for a Wedding
- Over-smoothing textured styles: If you want a bun to look soft and romantic, do not brush out every bit of texture. That texture is usually what makes it look modern.
- Skipping grip: Many wedding updo hairstyles long hair brides choose need texture to hold properly. Very silky hair often needs dry shampoo, texturizing spray, or a little powder at the roots.
- Using too few pins: Or the wrong kind. U-pins usually do a better job anchoring buns than standard bobby pins.
- Placing accessories dead center: Pearls and combs often look more natural, and more polished, when they sit slightly off to one side.
- Not planning for the veil: If you are wearing one, decide early whether it will sit above or below the bun. Do not leave that to the last minute.
FAQs
Which wedding day updo hairstyles hold best all day?
Are wedding updos better on clean or second-day hair?
Can I recreate an updo wedding hairstyle at home?
What if I’m wearing a veil with a low bun?
The best wedding day updo hairstyles are the ones that feel like you and hold up through the whole day. That’s really it. Not the most elaborate one. Not the one that looks best on someone else.
Try one style from this list. Practice it once with the accessories you will actually wear. Then take a few photos.
That one test run will tell you a lot.