
Quick, creative Christmas cookie decorating ideas you can pull off today, no pro skills needed. Last weekend, I set out 3 icing colors, 2 piping tips, and a tray of sugar cookies, and we made mittens, snowflakes, and little Christmas trees in under an hour. If you’ve been googling “cookie decorating ideas Christmas,” this is for you.
We’ll keep it simple: clear steps, basic tools, and easy upgrades. You’ll learn a few fast tricks – outline, flood, add a pop of color, and get ideas that work for a friend’s party or a quiet afternoon with the kids. Grab your cookies, mix a small batch of icing, and let’s make a plate that looks festive and tastes great.
Disclosure: Some of the links on this article are affiliate links. That means we may earn a small commission if you purchase, at no extra cost to you. We only recommend pieces we’d happily use ourselves.
Our Favorite Christmas Cookie Decorating Ideas
Here’s the full list with our favourite cookie designs for Christmas. Feel free to customize them where needed, but the easy steps and product lists will help you easily recreate them.
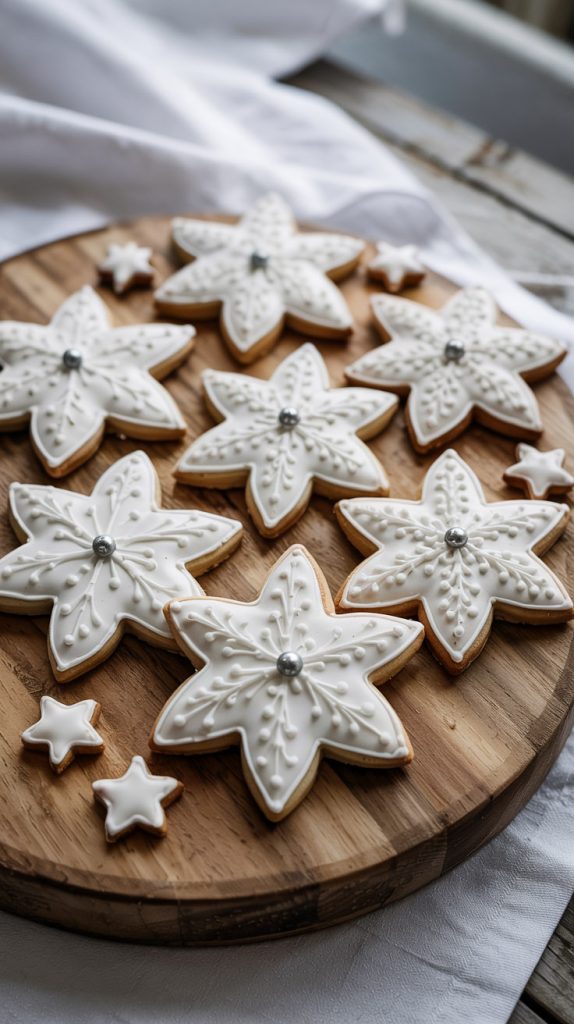
How to Make This Design:
- Bake your favorite sugar cookies in star shapes and let them cool.
- Cover each cookie with smooth white royal icing and let it set.
- With a fine piping tip, add tiny branches and dots to mimic a snowflake.
- Pop a silver candy pearl in the center while the icing is still wet.
What You’ll Need:
- Star cookie cutter set
- White royal icing
- Piping bags with small tips (#1 or #2)
- Silver dragees (candy pearls)
Product recommendations:



How to Make This Design:
- Bake round sugar cookies and let them cool completely.
- Flood each cookie with white royal icing for the snowman’s face and let it dry.
- Use a small round piping tip to add two chocolate brown eyes and a row of dots for the smile.
- Pipe a tiny orange dot in the center for the carrot nose.
What You’ll Need:
- Round cookie cutter
- White, brown, and orange royal icing
- Piping bags with small round tips (#1 or #2)
Product recommendations:
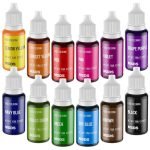

How to Make This Design:
- Bake tree-shaped cookies and let them cool fully.
- Flood with green royal icing and wait for it to set.
- Pipe a darker green outline and zigzag lines for garland.
- Add tiny round sprinkles or candy pearls for ornaments.
- For a special cookie, use white icing to write “Merry Christmas” in the center.
What You’ll Need:
- Christmas tree cookie cutter
- Green and white royal icing
- Piping bags with small round tips (#1 or #2)
- Small round sprinkles or candy pearls
Product recommendations:

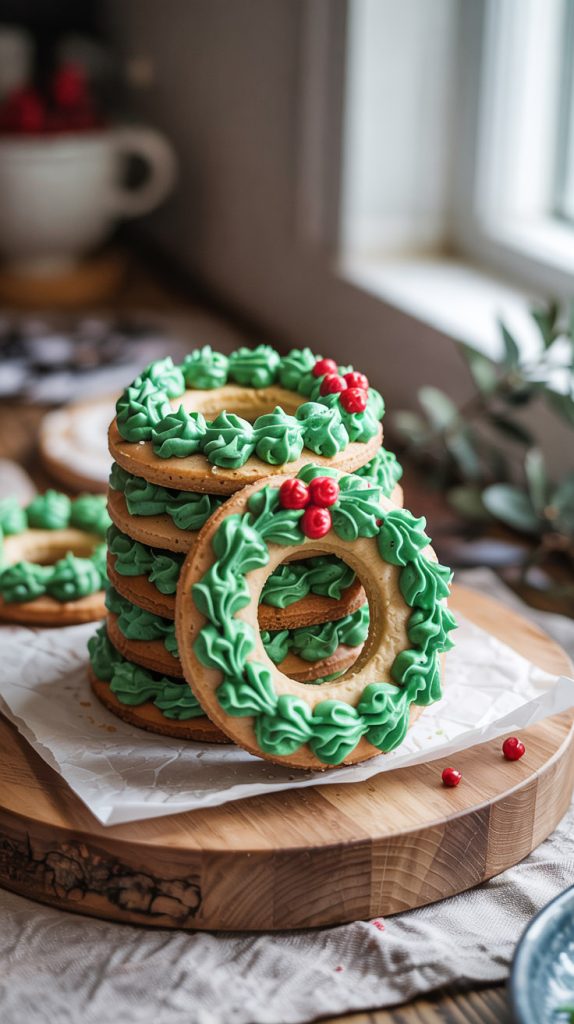
How to Make This Design:
- Bake round cookies with a hole in the middle (use two cutters: one large and one smaller for the center). Let them cool.
- Tint buttercream or royal icing a rich green and use a star piping tip to create leafy swirls around the ring.
- Add small red icing dots or candy pearls to look like holly berries.
What You’ll Need:
- Large and small round cookie cutters
- Green and red icing
- Piping bag with a star tip (#21 works well)
- Red candy pearls or mini red M&M’s
Product recommendations:


How to Make This Design:
- Bake round cookies, adding a small tab of dough at the top to mimic an ornament shape. Let them cool.
- Flood with white royal icing and let it dry completely.
- Pipe green and red borders around the edge, alternating colors for a festive look.
- Add gold dragees around the trim and pipe “Joy” in red icing across the center.
- Finish with a small bow detail at the top in red icing.
What You’ll Need:
- Round cookie cutter + small cutter or knife to create ornament tab
- White, red, and green royal icing
- Piping bags with small round tips (#1 or #2)
- Gold dragees
Product recommendations:


How to Make This Design:
- Bake Santa hat-shaped cookies (or use a triangle cutter and round the top corner). Let them cool completely.
- Flood the hat area with red royal icing and let it dry.
- Pipe a zigzag line of white icing along the bottom for the trim.
- Add a small swirl or dot of white icing at the tip for the pom-pom.
What You’ll Need:
- Santa hat or triangle cookie cutter
- Red and white royal icing
- Piping bags with small round tips (#2 or #3)
Product recommendations:



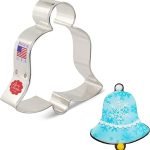
How to Make This Design:
- Bake bell-shaped cookies and let them cool completely.
- Flood with white royal icing and allow to dry fully.
- Pipe a fine outline around the edge for a polished finish.
- Place a gold dragee at the bottom center while the icing is still wet so it sticks.
What You’ll Need:
- Bell-shaped cookie cutter
- White royal icing
- Piping bags with small round tips (#1 or #2)
- Gold dragees
Product recommendations:


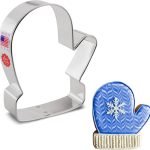
How to Make This Design:
- Bake mitten-shaped cookies and let them cool completely.
- Flood with red or blue royal icing and allow to dry.
- Use contrasting icing to pipe a snowflake in the center and add a decorative cuff pattern at the bottom.
- For extra charm, add tiny icing dots or swirls along the cuff edge.
What You’ll Need:
- Mitten-shaped cookie cutter
- Red, blue, and white royal icing
- Piping bags with small round tips (#1 or #2)
Product recommendations:

These reindeer cookies are full of Christmas cheer, especially with their big wide eyes and bright red noses, Rudolph would be proud. They’re almost too cute to eat, but their chocolate icing makes them impossible to resist.
How to Make This Design:
- Bake reindeer-shaped cookies and let them cool completely.
- Flood the face area with milk chocolate-colored royal icing and let it dry.
- Use darker brown icing to outline and fill the antlers and ears.
- Attach candy eyes with icing, then add a red candy or red icing dot for the nose.
What You’ll Need:
- Reindeer cookie cutter
- Brown and dark brown royal icing
- Candy eyes
- Red candies (like M&M’s) or red royal icing
Product recommendations:


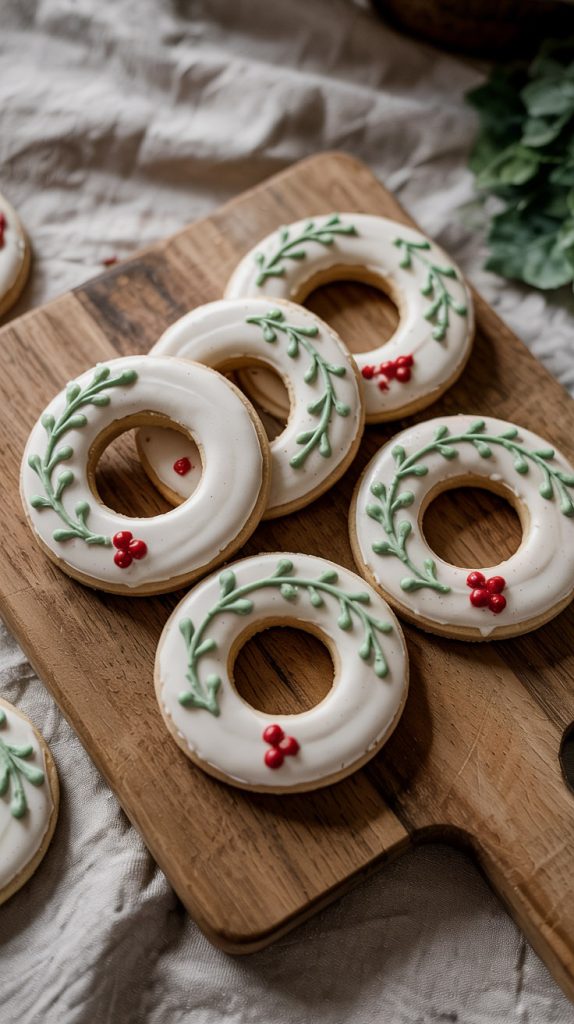
These delicate holly wreath cookies are like little edible ornaments. The clean white icing, soft green leaves, and bright red berries make them simple yet so festive, perfect for a classic Christmas look.
How to Make This Design:
- Bake ring-shaped cookies (use a large and small round cutter) and let them cool.
- Flood with white royal icing and allow it to dry fully.
- Using green icing and a small tip, pipe leafy vines along one side of the wreath.
- Add tiny red icing dots or mini candy pearls for holly berries.
What You’ll Need:
- Large and small round cookie cutters
- White, green, and red royal icing
- Piping bags with small round tips (#1 or #2)
Product recommendations:

How to Make This Design:
- Bake tree-shaped sugar cookies and let them cool completely.
- Melt dark or milk chocolate and dip the bottom half of each cookie.
- Place on parchment paper and immediately sprinkle crushed candy canes on the chocolate before it sets.
- Let the chocolate harden at room temperature or in the fridge.
What You’ll Need:
- Christmas tree cookie cutter
- Good-quality dark or milk chocolate
- Crushed candy canes
- Parchment paper
Product recommendations:


How to Make This Design:
- Bake candy cane–shaped cookies and let them cool completely.
- Flood with white royal icing and allow it to dry.
- Pipe red icing along the edges and add diagonal stripes across the cane.
- Sprinkle lightly with coarse sugar for a frosty touch.
What You’ll Need:
- Candy cane cookie cutter
- White and red royal icing
- Piping bags with small round tips (#1 or #2)
- Coarse sanding sugar
Product recommendations:


These gingerbread men are full of personality, with their cheerful smiles, colorful buttons, and cozy red scarves. They’re the kind of cookies that make you feel like a kid again, especially with a mug of hot cocoa on the side.
How to Make This Design:
- Bake gingerbread man cookies and let them cool completely.
- Outline and flood with brown royal icing, leaving to dry.
- Pipe white icing for the smile, eyes, and sleeve/leg details.
- Use red icing to add a scarf, and finish with colorful candy buttons.
What You’ll Need:
- Gingerbread man cookie cutter
- Brown, white, and red royal icing
- Small round colorful candies (mini M&M’s work great)
- Piping bags with small round tips (#1 or #2)
Here is an easy gingerbread cookies recipe, if you are in the need of one.
Product recommendations:


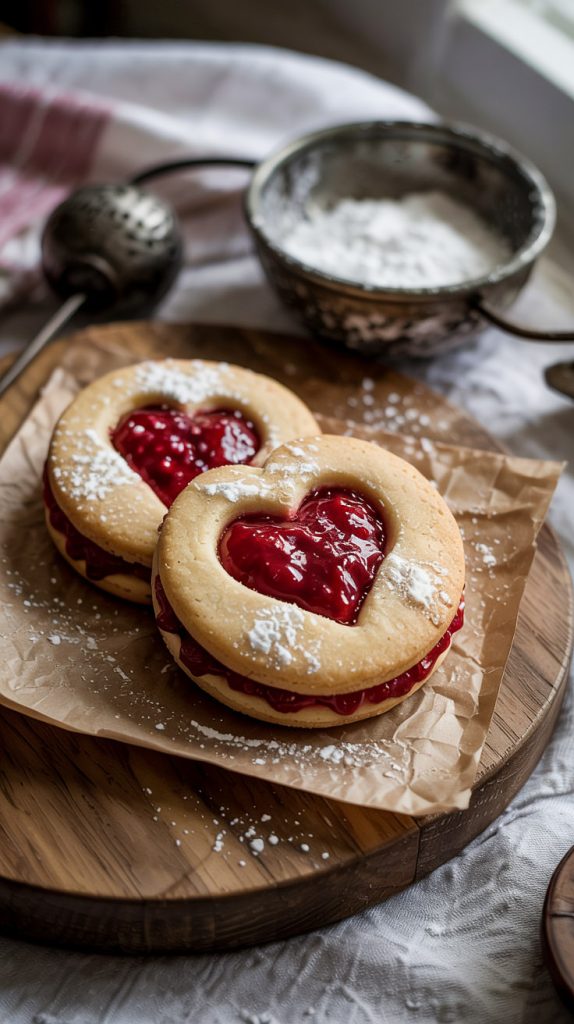
How to Make This Design:
- Bake round cookies, cutting a heart shape out of the center for half of them. Let them cool completely.
- Spread raspberry jam on the solid cookies, then place the heart-cut cookies on top to sandwich them together.
- Add a light dusting of powdered sugar over the top for a snowy finish.
What You’ll Need:
- Round and heart-shaped cookie cutters
- Raspberry jam (or your favorite red fruit jam)
- Powdered sugar
- Small sieve for dusting
Product recommendations:

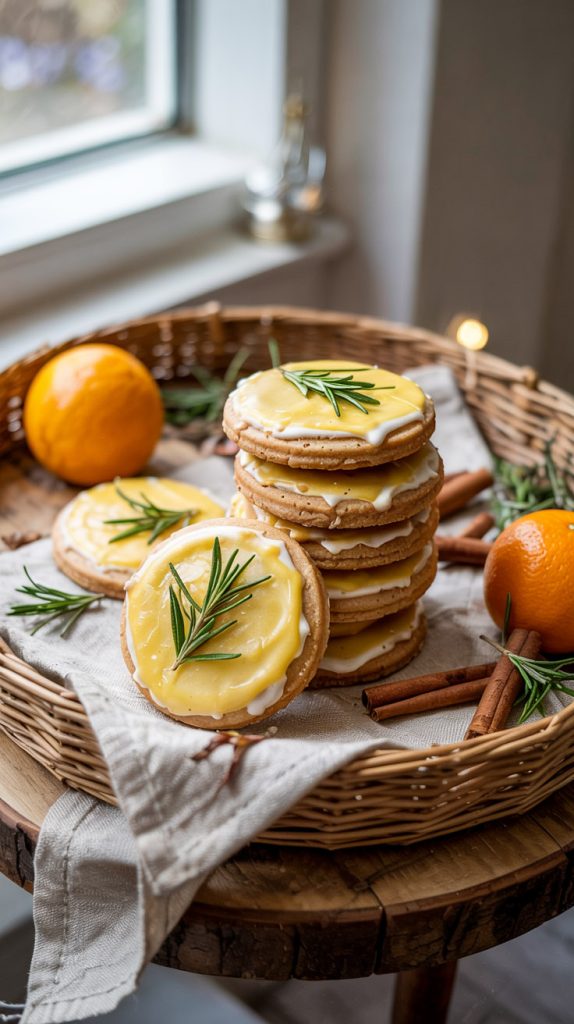
How to Make This Design:
- Bake round sugar cookies and let them cool.
- Spread a thin layer of white icing as the base.
- Top with a swirl of citrus glaze (made from lemon and orange juice with powdered sugar).
- Garnish with a small sprig of fresh rosemary for a fragrant, festive touch.
What You’ll Need:
- Round cookie-cutter
- White royal icing
- Lemon and orange juice for glaze
- Powdered sugar
- Fresh rosemary sprigs
Product recommendations:

How to Make This Design:
- Bake star-shaped cookies and let them cool completely.
- Flood with white royal icing and allow to dry.
- Sprinkle gold sanding sugar in the center while the icing is still slightly tacky so it sticks.
- Let them set completely before serving or packaging.
What You’ll Need:
- Star-shaped cookie cutter
- White royal icing
- Gold sanding sugar
- Piping bags with small round tips (#2)
Product recommendations:


How to Make This Design:
- Bake Christmas tree-shaped cookies and let them cool completely.
- Flood with green royal icing and let it set.
- Add small colorful sprinkles for ornaments while the icing is still soft.
- Place a yellow star sprinkle at the top of each tree for the finishing touch.
What You’ll Need:
- Christmas tree cookie-cutter
- Green royal icing
- Assorted round sprinkles and yellow star sprinkles
- Piping bags with small round tips (#2)
Product recommendations:

How to Make This Design:
- Bake Christmas tree-shaped cookies and let them cool completely.
- Flood with white royal icing for a smooth, snowy base and let it set.
- Using the same icing with a piping tip, add small loops or rosettes across the tree to create a garland effect.
What You’ll Need:
- Christmas tree cookie-cutter
- White royal icing
- Piping bags with small round or star tips (#16 for rosettes)
Product recommendations:

These Christmas stocking cookies have a warm, rustic feel, like something you’d find hanging by the fireplace in a cozy cabin. The rich brown icing, stitched border, and fluffy white cuff make them charmingly old-fashioned.
How to Make This Design:
- Bake stocking-shaped cookies and let them cool completely.
- Flood the stocking area with brown royal icing and let it dry.
- Use white icing to add a cuff at the top and a stitched border around the edges.
- Add a few lines across the cuff for a textured, knit-like look.
What You’ll Need:
- Stocking cookie-cutter
- Brown and white royal icing
- Piping bags with small round tips (#1 or #2)
Product recommendations:

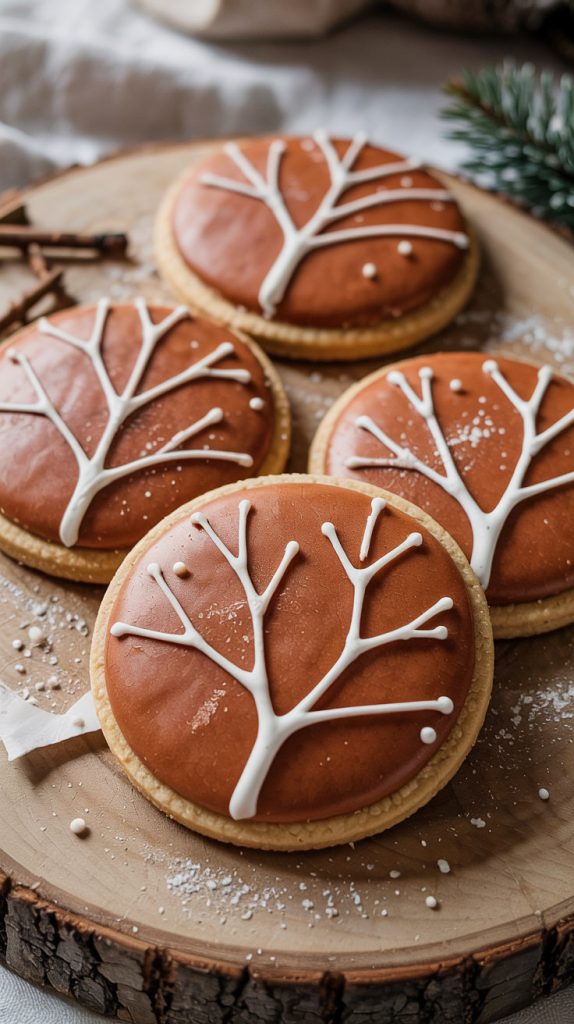
How to Make This Design:
- Bake round sugar cookies and let them cool completely.
- Flood with brown royal icing and allow it to set.
- Using white icing and a fine tip, pipe a tree trunk and branching limbs starting from the bottom center.
- Add a few small white dots for falling snow.
What You’ll Need:
- Round cookie cutter
- Brown and white royal icing
- Piping bags with small round tips (#1 or #2)
Product recommendations:
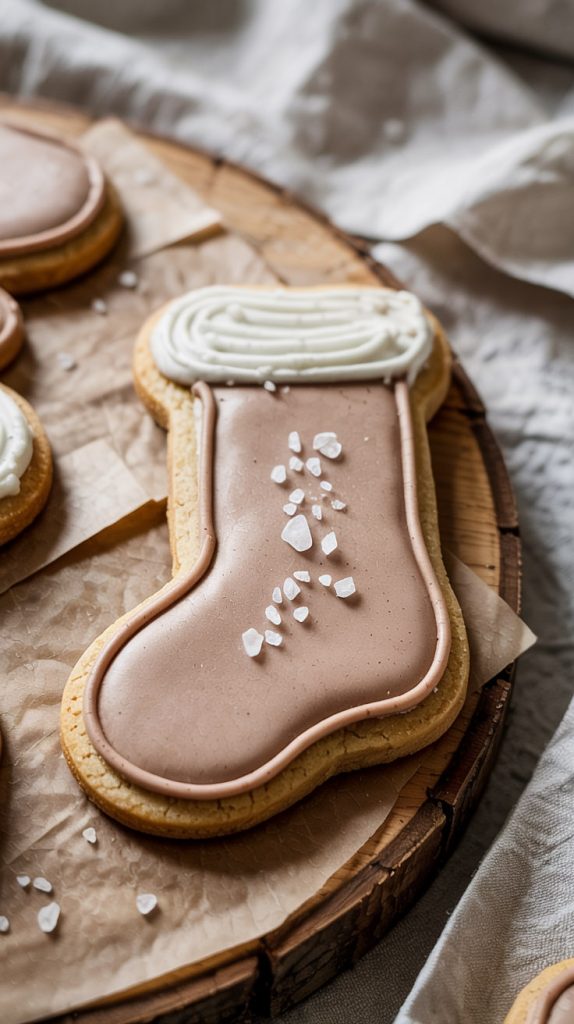
How to Make This Design:
- Bake stocking-shaped cookies and let them cool completely.
- Flood the stocking area with light brown royal icing and let it dry.
- Pipe the top cuff with white icing in layered loops for a cozy texture.
- Finish with a scattering of coarse sugar or edible glitter for a snowy touch.
What You’ll Need:
- Stocking cookie cutter
- Light brown and white royal icing
- Coarse sugar or white sanding sugar
- Piping bags with small round tips (#2)
Product recommendations:

How to Make This Design:
- Bake bell-shaped cookies and let them cool completely.
- Flood with soft pink royal icing and allow it to dry.
- Using white icing and a fine tip, outline the bell, pipe a bow at the top, and add two thin stripes across the middle.
- Pipe a small dot at the bottom for the clapper.
What You’ll Need:
- Bell-shaped cookie-cutter
- Soft pink and white royal icing
- Piping bags with small round tips (#1 or #2)
Product recommendations:

How to Make This Design:
- Bake oval-shaped cookies and let them cool.
- Flood with dark green royal icing and allow to dry completely.
- Using light green icing, pipe a central stem with small branching lines.
- Add tiny red icing dots for berries to complete the holly effect.
What You’ll Need:
- Oval cookie cutter
- Dark green, light green, and red royal icing
- Piping bags with small round tips (#1 or #2)
Product recommendations:

These mitten cookies look like they’ve been knitted just for winter, soft blue icing with a cozy cable-knit detail and a fluffy white cuff you can almost feel. They’re like edible winter sweaters for your cookie plate.
How to Make This Design:
- Bake mitten-shaped cookies and let them cool fully.
- Flood the mitten area with soft blue royal icing and let it dry.
- Pipe a vertical cable-knit design down the center using thick icing for texture.
- Add the cuff with piped white icing, using a star or petal tip to create a fluffy, knit-like look.
What You’ll Need:
- Mitten cookie-cutter
- Soft blue and white royal icing
- Piping bags with small round tips (#2) and a star tip (#16)
Product recommendations:
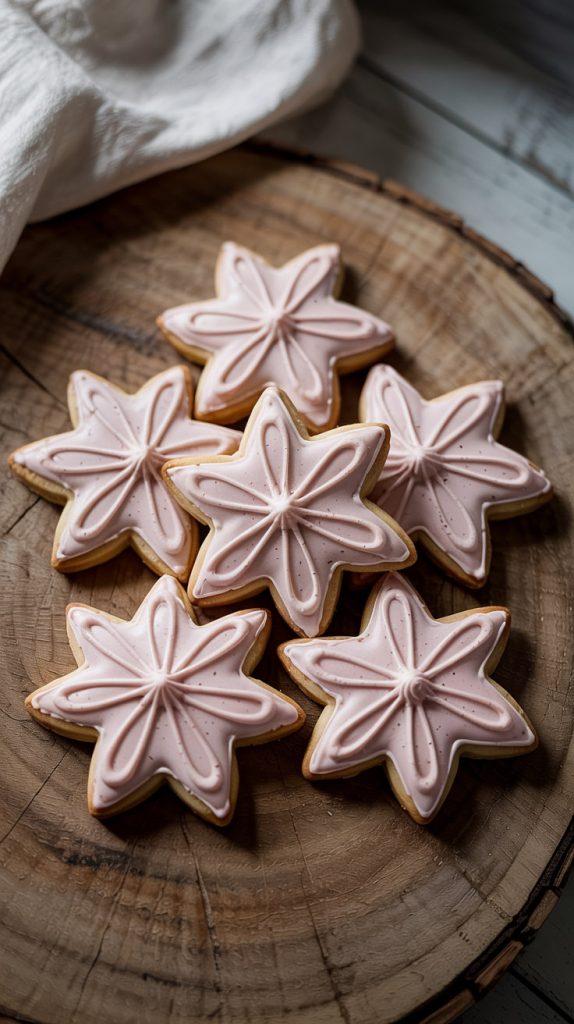
How to Make This Design:
- Bake star-shaped cookies and let them cool completely.
- Flood with light pink royal icing and let dry.
- Using the same icing in a slightly thicker consistency, pipe long petal-like loops from the center to each point of the star.
- Add a small icing dot in the center for a neat, finished look.
What You’ll Need:
- Star cookie cutter
- Light pink royal icing
- Piping bag with a small round tip (#2)
Product recommendations:

How to Make This Design:
- Bake Santa head-shaped cookies and let them cool completely.
- Flood the hat area with red royal icing and the beard area with white royal icing; let dry.
- Use peach or light beige icing to create Santa’s face between the hat and beard.
- Pipe black dots for eyes and a small pink circle for the nose.
- Using red icing and a fine tip (#1), pipe “ho ho” across the beard for a festive touch.
What You’ll Need:
- Santa’s head cookie cutter
- Red, white, peach/beige, black, and pink royal icing
- Piping bags with small round tips (#1 and #2)
Product recommendations:

How to Make This Design:
- Bake snowflake-shaped cookies and let them cool completely.
- Flood each cookie with pastel royal icing in your chosen colors and allow them to dry.
- Using stiff white royal icing and a small round tip (#1 or #2), pipe delicate snowflake lines from the center out to each point.
- Add tiny branch-like details along each line.
- Place a pearl sugar candy in the center before the icing sets.
What You’ll Need:
- Snowflake cookie cutter
- Pastel royal icing (pink, lavender, mint, ivory)
- White royal icing (stiff consistency)
- Small round piping tip (#1 or #2)
- Pearl sugar candies
Product recommendations:

Tips & Tricks for a Stress-Free Christmas Cookie Decorating Session
- Plan your designs: Gather inspiration photos and decide on 3-4 designs you’ll focus on. This prevents decision fatigue in the middle of your decorating.
- Batch your icing: Mix all your icing colors before you start piping so you can work efficiently.
- Invest in good piping tips: A couple of quality small round tips (#1, #2, #3) will make your Christmas tree cookies decorating and snowflake details look sharp and clean.
- Use a scribe tool: This little stick helps smooth icing, pop air bubbles, and nudge sprinkles into place for precise Christmas cookie decor ideas.
- Prepare a drying area: Cookies need time for icing to set, so lay them out on parchment-lined trays away from curious pets and little fingers.
Decorating cookies at Christmas isn’t just about making something pretty to eat; it’s about slowing down, laughing over slightly wonky designs, and making memories that feel like home. Whether you’re hosting a big Christmas cookie decorating party or simply trying out a few new Christmas cookie decorating ideas on a snowy afternoon, I hope these designs inspire you to get creative.
So pour yourself a cup of hot cocoa, put on your favorite holiday playlist, and let your kitchen smell like sugar and cinnamon. Because at the end of the day, the most beautiful Christmas cookies designs are the ones made with love (and maybe just a little too much frosting).